Trading in a range can be frustrating—until you learn to see the hot zones where traders are making their moves.
I will stay take losses. But I have a better chance of not getting in repeated reversals which will take my profit away from my prior good trades!
After studying triangles extensively (and, let’s be honest, losing a ridiculous amount of money in them), I’ve developed a structured method for navigating these setups.
You can also apply this approach in flags, as long as you’re trading in the ALWAYS IN direction—but that’s a topic for another post.
Why This Works
You NEVER know exactly where the most popular stop is. But with practice, it becomes visible, especially on the second entry.
The key? Patience.
Let’s break it down step by step.
Step 1: Identify the Wide Stops
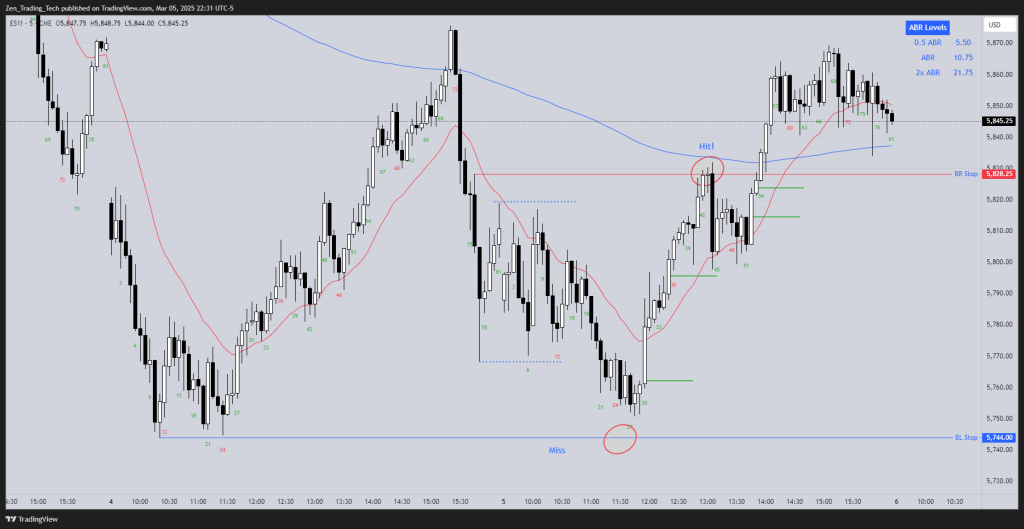
Find the major stop locations for both bulls and bears:
- For Bears: The top of the last bear spike
- For Bulls: The low of yesterday
These are reasonable areas where traders could put a stop, which if it gets hit, shows a change in the market cycle.
Step 2: Divide the Range into Thirds

Use a Fibonacci tool to section off the range into thirds and highlight the 1:2 risk-reward trade areas.
Why 1:2?
Because the odds in a trading range are 50/50—so I need to get paid for the lack of probability. The best way to do that? Only take trades in these high-probability zones.
Step 3: Spot the Entry Traps Traders Fall Into

Now, look at where traders are stepping in too early or too late—these are your best trade locations.
Examples of Entries:
- Selling B3: Weak bull follow-through.
- Selling B9: Second entry short at the moving average.
- Selling the MA on B15: Traders betting on a deeper pullback.
- Buying B6: Catching bulls trying to establish support.
These are common patterns, but they only work in the right locations.
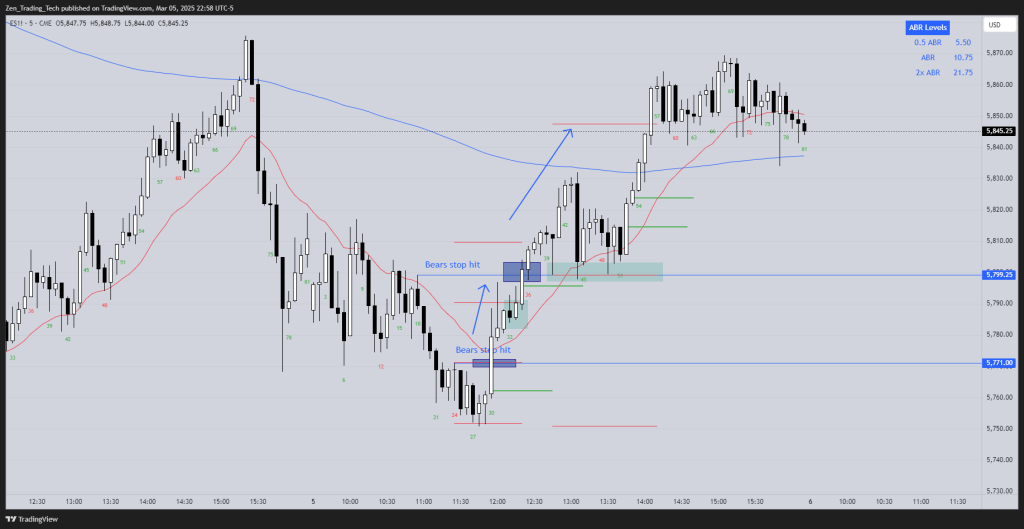
Step 4: Who Got Stuck? Repeat the Process

Every trade creates winners and losers—your job is to figure out who’s trapped and how they’ll react.
For Bulls
- For now, lets ignore the fact it is a strong bear spike and imagine you still believe in the range.
- You didn’t get a buy signal bar.
- But if you bought B20 or B21, how do you manage it?
- Your stop is still in the same place.
- You only entered part of your position.
- So what do you do? Try again—buy another 50% at the stop level or lower third of the range (B25–B29).
- Exit breakeven on the first position and hold the second.
For Bears
- For now, lets ignore the fact it is a strong bull spike and imagine you still believe in the range.
- You didn’t get a sell signal bar.
- Sold B35? You’re stuck.
- Sell more at B39 to average in.
- If you didn’t take profits on B40, exit both positions at breakeven.
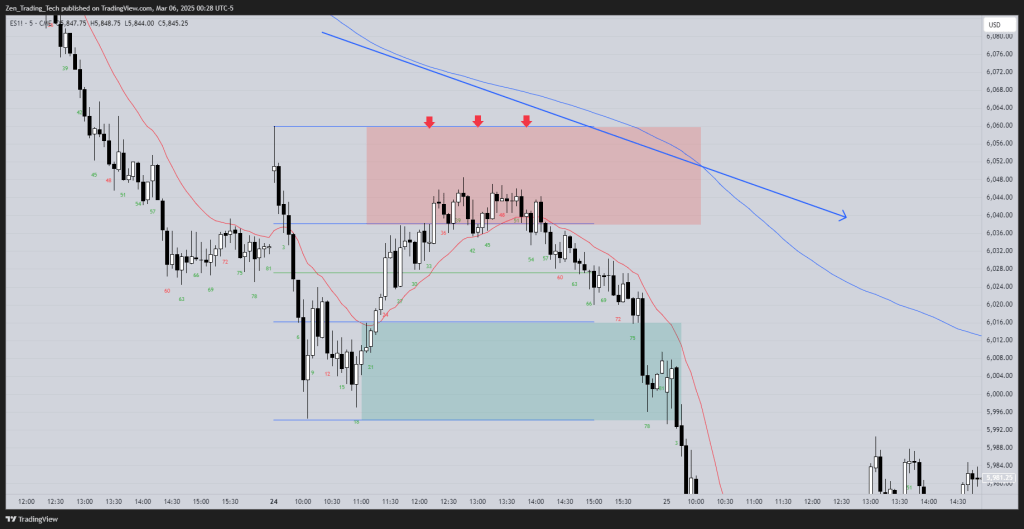
Step 5: What Happens When One Side Loses? Breakout.
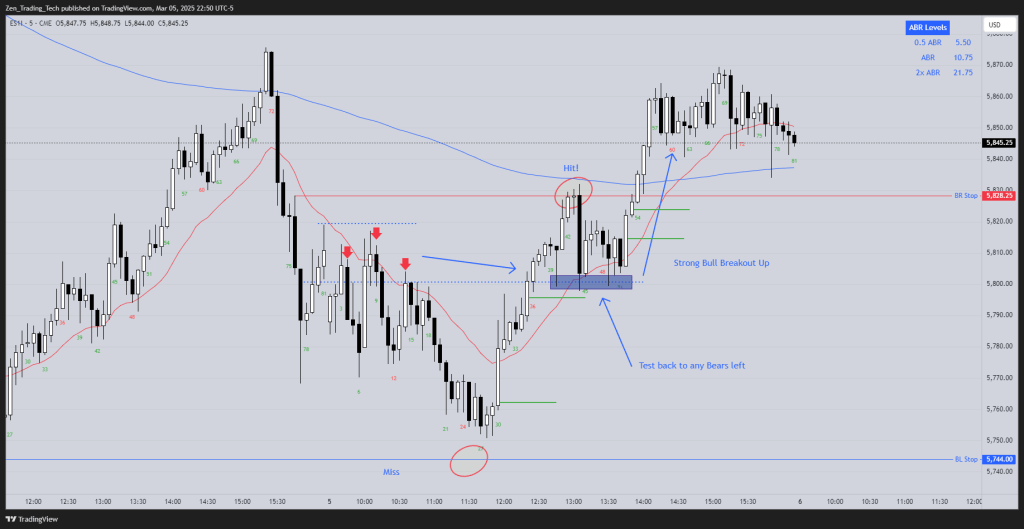
When one side gives up, price breaks out.
Two Ways to Understand This
- Above the Stops:
- The original stop was never moved.
- Bears give up when that stop is hit.
- Other bears try to scale in, but they exit where the first bears entered.
- Trailing Stops:
- If you were trailing the stop down, you got stopped earlier and had a chance to reverse long.
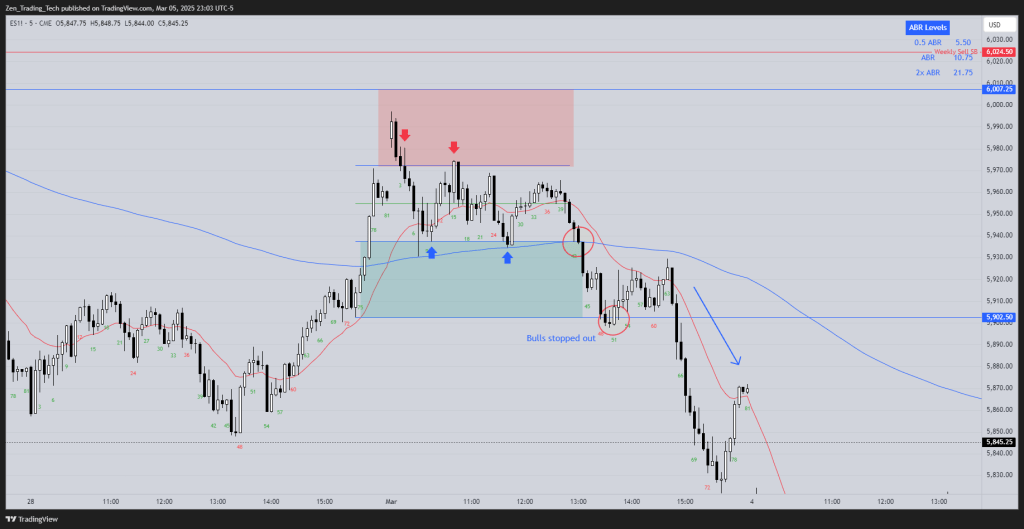
Practice Mark-Ups: The Key to Mastery
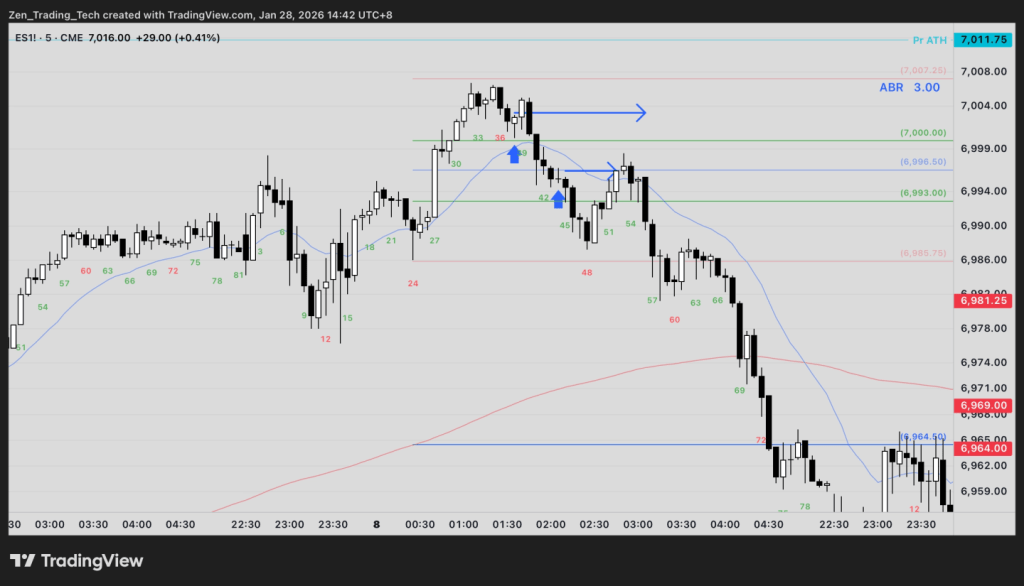
Look at the day before—notice how a successful trap led to a second leg down.
Breakout mode – Stop Fading
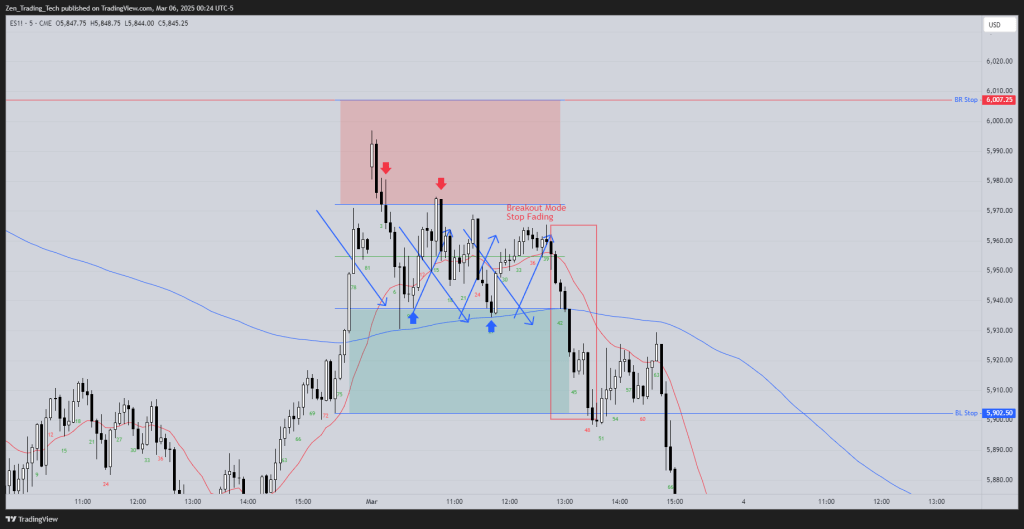
Stop fading after 3 legs in any direction
Now you surely have a Double Top and Double Bottom and you should wait for a breakout
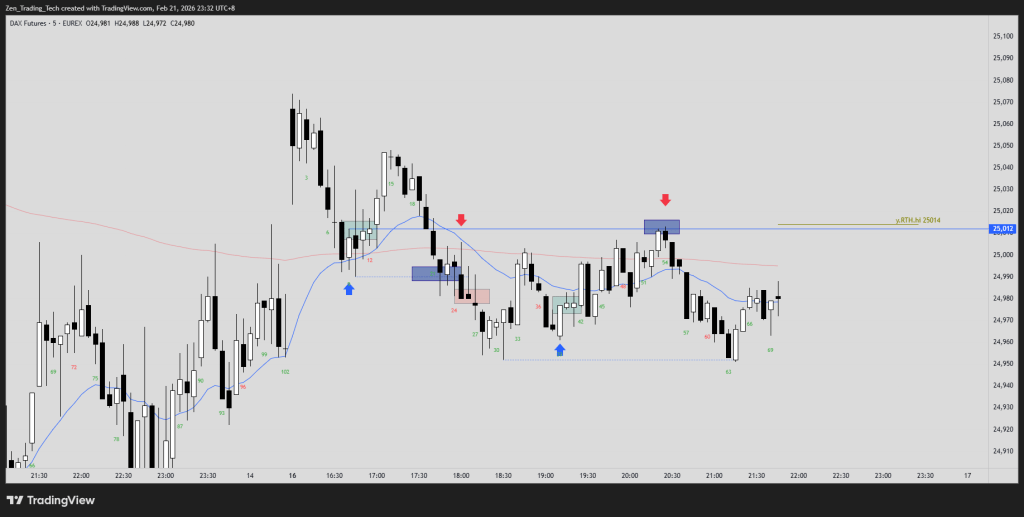
Higher Time Frame – Pick a Side
Below the 200MA, so I’m more likely looking to short with this strategy than get long.
Bet on a test below. So never truly 50/50 – pick a side.
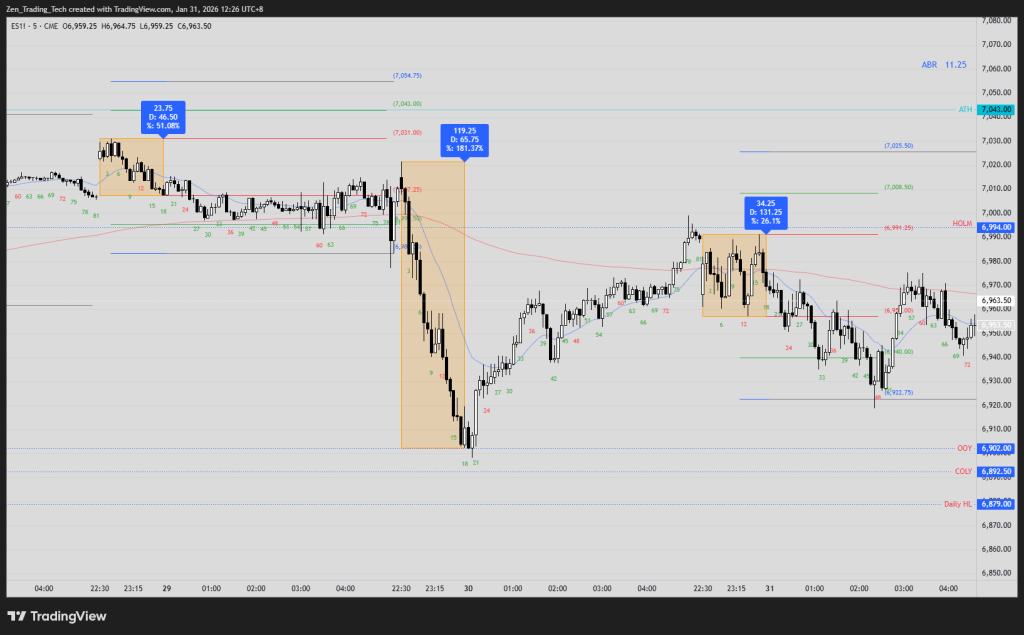
Can I use a Super Wide Stop?

That’s a whole day of volatility.
So it’s difficult to manage the scale in and management correctly.
Even though it worked here, this is not repeatable for my trading strategy.
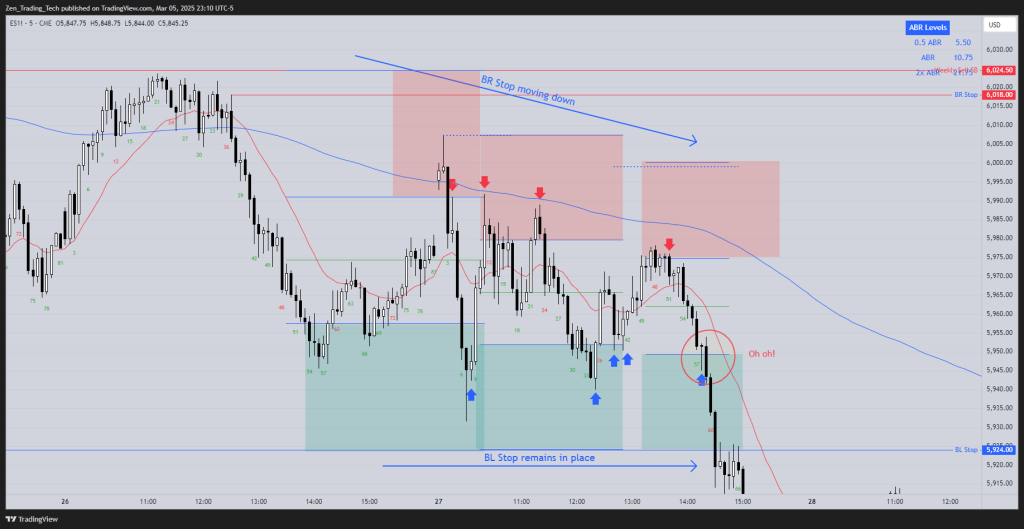
What Happens When One Side Can Move Their Stop?
Bulls, on the other hand, keep their stops at the low of yesterday.
After a strong leg, bears are happy to lower their stops—they don’t want to miss the next move.
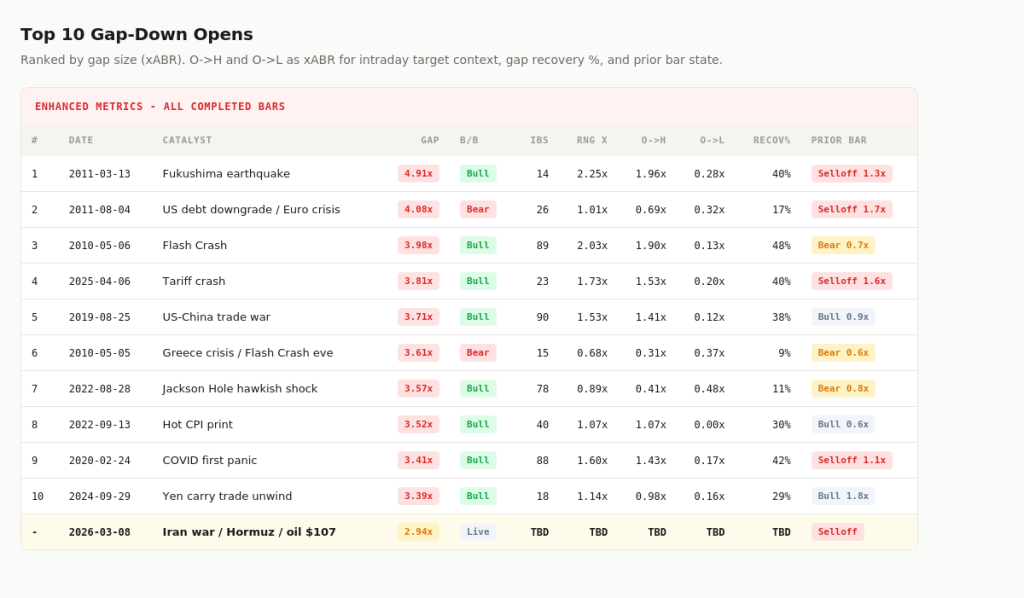
Hot Zones Across Multiple Days
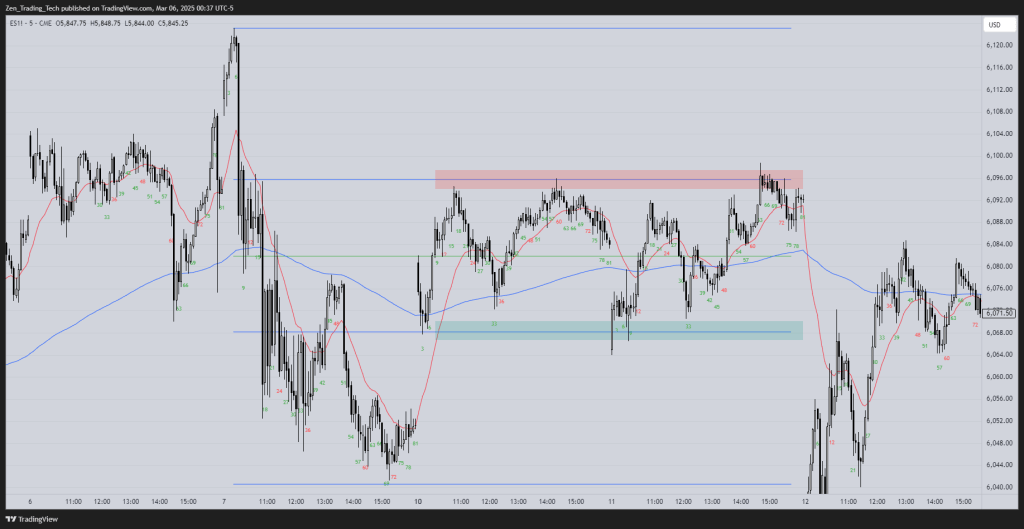
- Here we spend a few days in hot zones
Follow-Up
Did you find this helpful?
Drop a comment and let me know—also, let me know which part of this approach you’d like me to expand on in a future post!


Leave a comment