Introduction to Shaved Bars
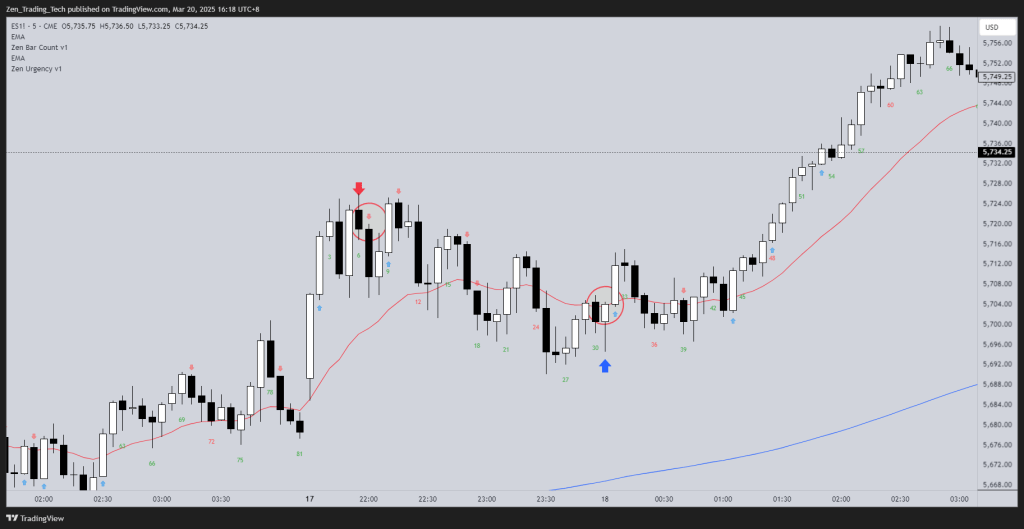
A shaved bar is a bull bar with no or minimal lower tail (less than 10% of the total bar size) or a bear bar with no or minimal upper tail (less than 10% of the total bar size).
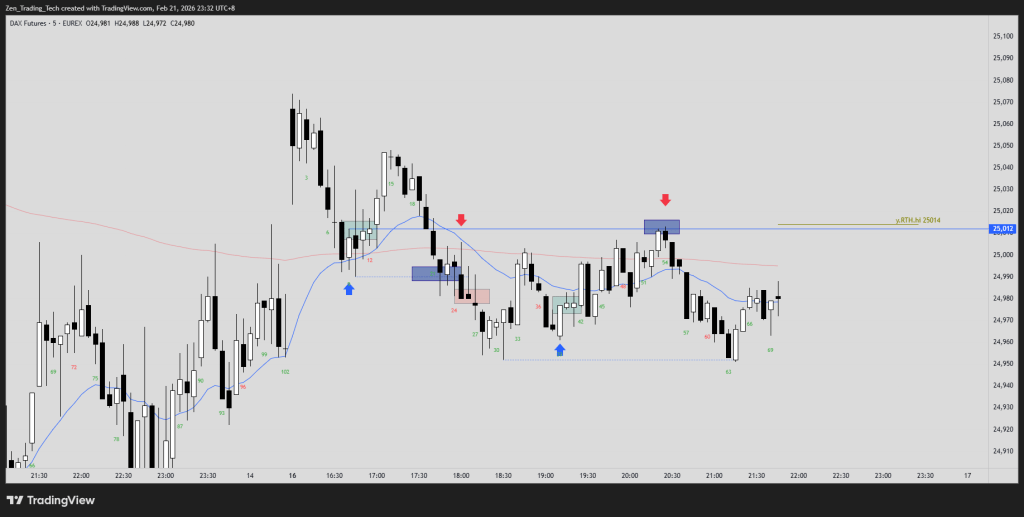
This indicator places an arrow below a shaved bull bar (pointing up) and an arrow above a shaved bear bar (pointing down).
(But you can see it easily without 🙂
Indicator
- Free Indicator for TRADINGVIEW and code is open-source so you can use AI to code it for your software
- https://zentradingtech.com/2025/03/20/mastering-urgency-in-trading-with-shaved-bar-indicator/
- Use it to find and study this concept!
General Concepts
Momentum Confirmation

- Shaved bars mean momentum at the close of the bar
- This signals that traders are buying the close of bull bars and selling the close of bear bars
- Practice:
- Look for patterns that confirm with a shaved bar
- What difference does the MA make to the hit rate?
Arrow Limit Orders & Buy Zone
- Concept:
- When the indicator prints a bull arrow, the arrow itself marks a logical buy point if price pulls back to that level.
- The buy zone is generally the lower half of a bull bar.
- For a bear arrow, the sell zone is the upper half of a bear bar.
- Practice:
- Look at the chart and see how the market came back to test prior entries
- Look at charts and find where they DID NOT TEST indicating URGENCY
Breakout / Pullback Concepts
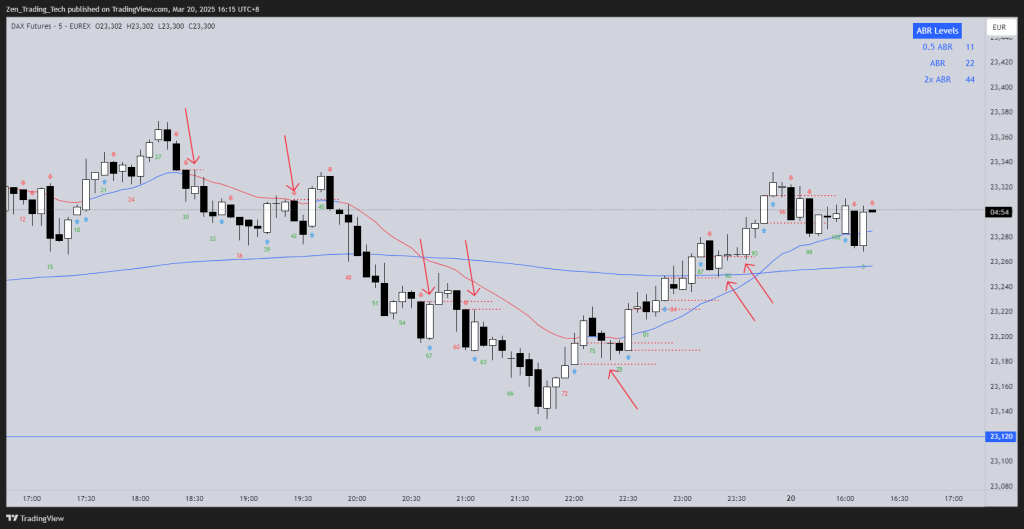
Shaved Bar as an Exit (Second Entry Short Setup)
- Concept:
- Price is moving up in a breakout.
- The first bear bar forms — often weak — and no one sells.
- The second bear bar is stronger, ideally closing near its low. This becomes the exit signal for bulls and entry signal for bears.
- Key Insight:
- This creates a natural point where bulls exit and bears enter — a shift in control.
- If your in you can get out and if out you have an option to get in.
- Practice:
- Look for signlas that close near their lows.
- Now look for signals that were weak that came back for traders to take a second time.
Second Leg Entry (Shaved Bar After a Strong Bull Bar)
- Concept:
- A strong bull bar followed by a shaved bull bar is a strong buy signal for a second leg up.
- Context:
- Works best when there’s momentum, like a breakout from a range or strong trend.
Takeoff Retest Entry (Second Chance Entry)
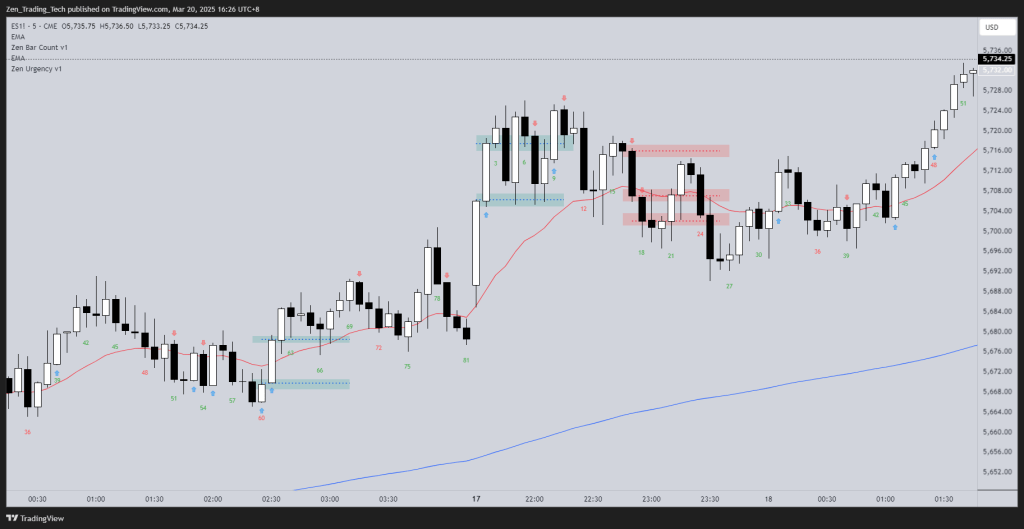
- Concept: After a shaved bar entry, price may pull back to that same entry price. This creates a second entry opportunity.
- Bar Requirement: Ideally, you want to see a doji or tail bar form at that retest point.
- Some traders will enter with a limit order, but waiting for confirmation (e.g., a tail bar or doji) is generally safer.
Limit Order Fade – Breakout Point Test (Shaved Bar)
- Concept: After a strong shaved bar forms price surges with momentum.
- Key Idea: Counter-trend traders may still attempt to fade the move but often get trapped.
- The first pullback from that strong shaved bar often fails as they defend the breakout point.
- Entry Point: Traders will typically buy:
- A few points lower.
- At obvious support levels.
- At the breakout point itself.
- Context: This does not require a strong trend, but it does require a clear momentum burst — this pattern can occur in both trends and trading ranges.
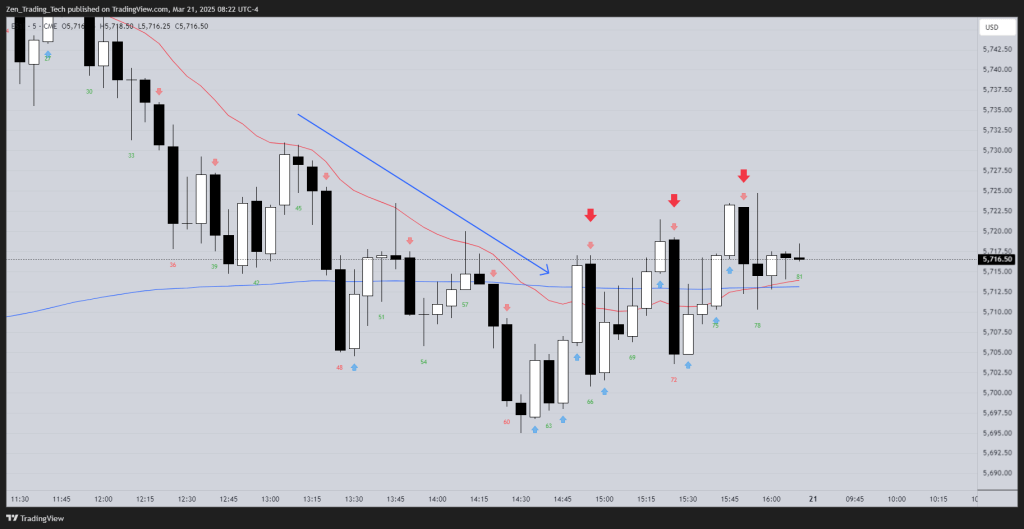
Trap Signal – Momentum Disappears After a Shaved Bar

- Concept: After a strong shaved bar creates momentum, that momentum unexpectedly disappears.
- A strong bear bar follows, trapping bulls who entered too late.
- Key Insight: The shaved bar signals momentum, but if the follow-through fails and reverses, bulls get trapped.
- This pattern is often marked by a clear arrow + gap where price sharply reverses after the shaved bar.
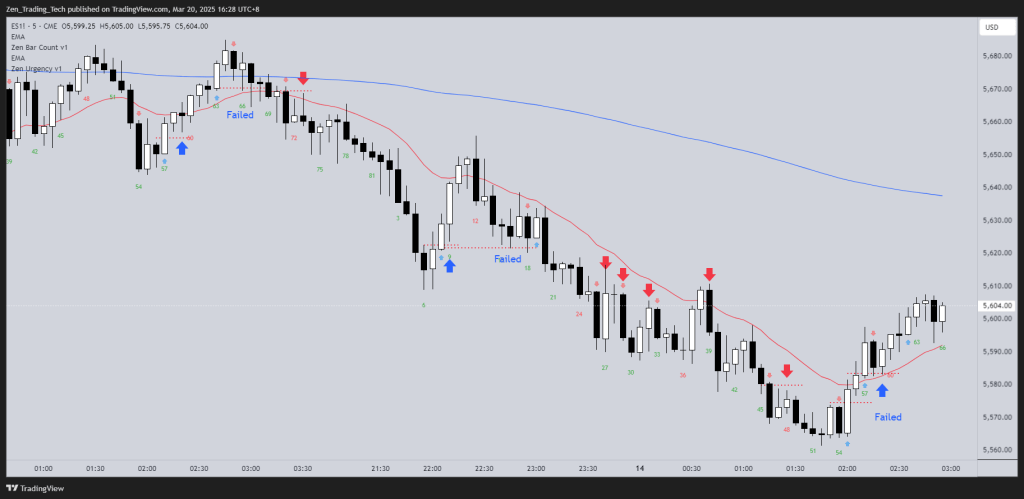
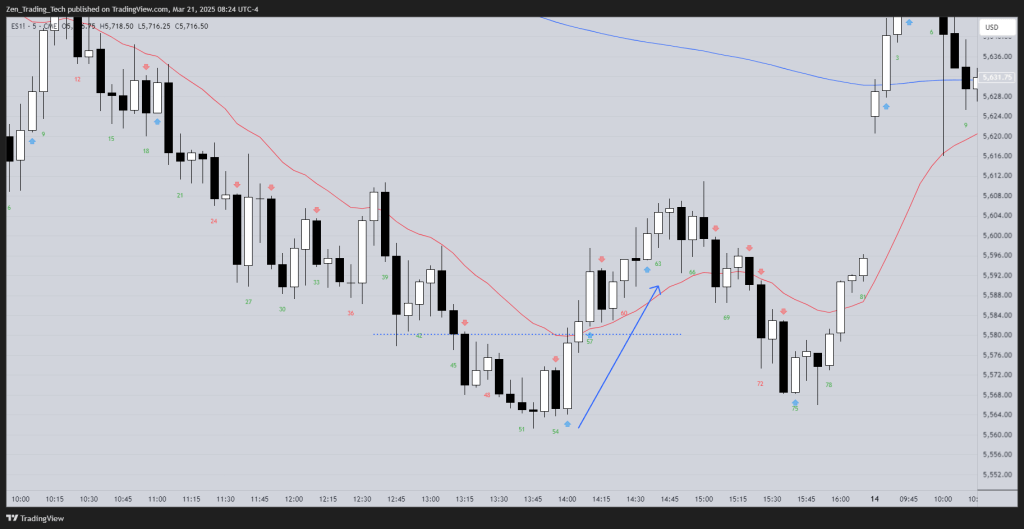
Failed Shaved Bar (Retest & Shaved Away)
- Concept: A shaved bull bar forms with an urgent buy signal, but price then moves below that bar’s low with a strong bear close.
- Often, price will retest the original shaved bar’s entry point before continuing lower — giving trapped bulls a chance to exit at breakeven.
Channel Concepts
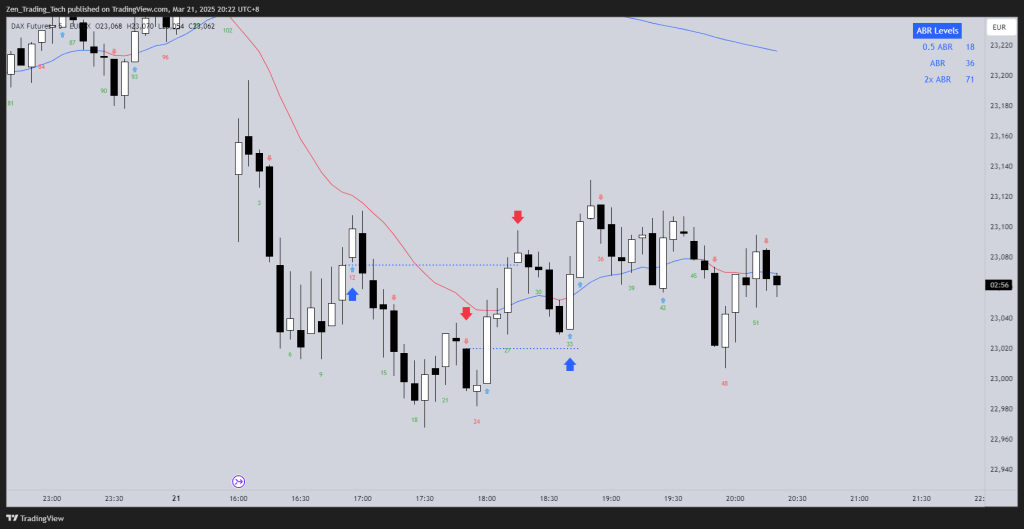
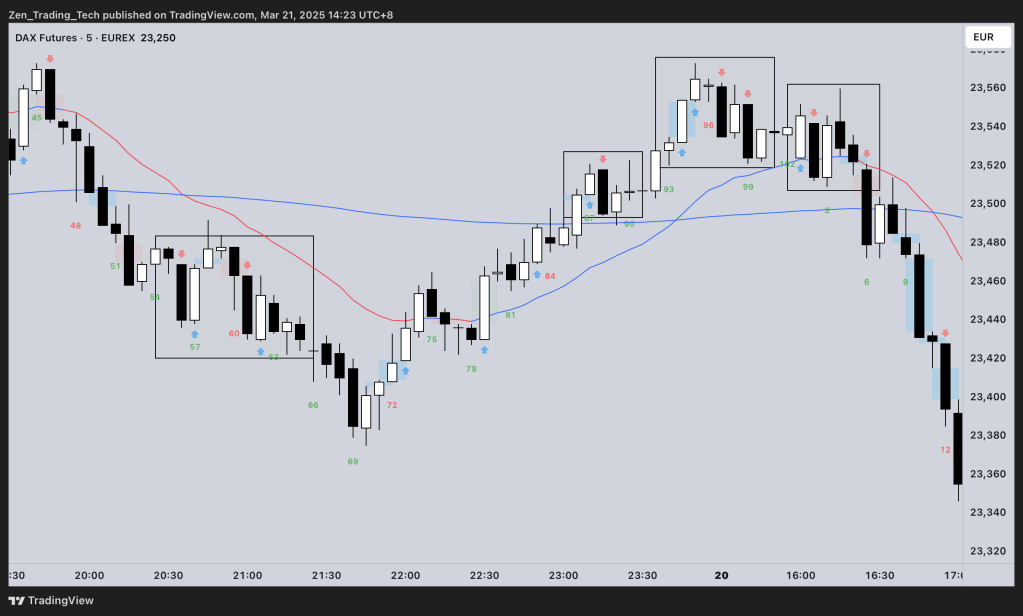
Channel Trading – Strong Bull Bar, Then Shaved Bear Bar
- Concept: In a weak bear channel, price is grinding down slowly.
- A strong bull bar appears, closing near its high at or near the moving average.
- Instead of reversing upward, the next bar is a shaved bear bar — this signals that traders actually sold the close of the strong bull bar.
MAPB Entry – Weak Bear Bar Becomes a Shaved Bear Bar
- Concept: In a bear channel, two strong bull bars form as price rallies to the moving average.
- A weak bear doji forms, then becomes a shaved bear bar — this is the short entry signal.
Trading Range Concepts
Trading Range Breakout – Failed Follow-Through (Bear Breakout, Bull Reversal)
- Concept: In a trading range, price tries to break out with strong bear bars closing below the range.
- This signals a potential breakout, but in this case, strong bull bars push price back into the range.
Trading Range Breakout – Spike and Channel Down

- Concept: Price is in a trading range, then breaks below with two strong bear bars closing below the range.
- Instead of reversing, this breakout transitions into a spike and channel down.
Tight Trading Range (Arrow Confusion Zone)
- Concept: A tight trading range forms when arrows appear in both directions, trapping both bulls and bears.
Consecutive bars with opposite arrows, Can act as a final flag for a test back, After momentum is good, after several legs up and far from MA is probably exit
Special Day Trading & Continuation Concepts
Yesterday’s High/Low – Failed Breakout (Day Trading Signal)

- Concept: If yesterday was a bull bar and today opens higher (or gaps up), price may rally early but often pulls back.
- First Trade: After breaking above yesterday’s high, traders often buy shaved bull bars back to that breakout point.
- Second Trade: At yesterday’s high, if today isn’t a strong bull day, expect bear arrows and shaved bars down as sellers defend that price.
Shaved Bar as a Swing Entry Signal
- Concept: A shaved bull bar can act as a swing entry signal.
- Failed swing long setup a swing short attempt
Swing Continuation Entry (Shaved Exit After a Swing Entry)
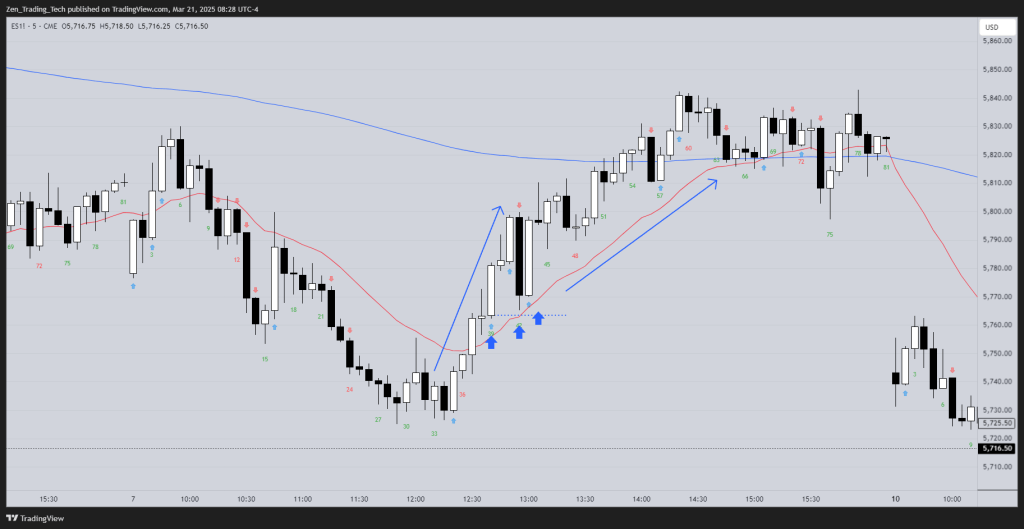
- Concept: After a swing entry has taken off, price often returns to the swing entry area.
Holding Trades (Arrow Continuation Strategy)
- Concept: If you’re already in a trade and it’s moving in your direction, continue to hold as long as there are more arrows confirming the move.
- Above you can see the bear exit was strong and exit longs below. Try and get back in if more long arrows appear.
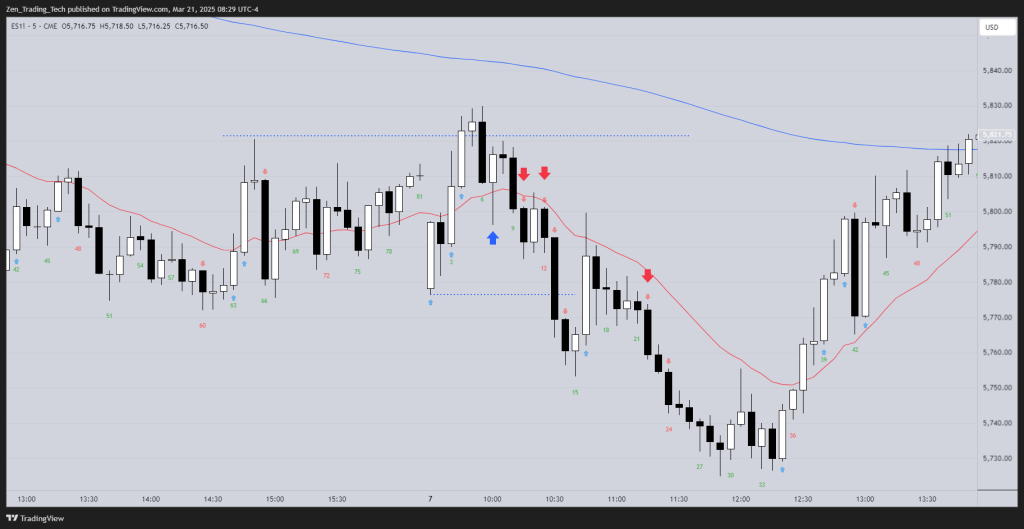
Shaved Bars as Exit Signals – Checking Market Consensus

- Concept: If price is moving up and you’re long, watch for a strong second sell signal.
- The second good bear bar — ideally a shaved bear bar — is the best exit point.
- Key Insight: This exit aligns with what other traders are doing. If no one else exits there and you do, you’re likely out of sync with the market.
Reversals – Shaved Bar Flip
- Look at the Bear bar that got flipped
- Then the Bull bar that got flipped
- How can you participate when traders got stuck?
- Here that big bear bar (sell climax SX) didn’t get flipped

Conclusion
- I hope you enjoyed that post and it inspired you to try using shaved bars in your trading!


Leave a comment