
Here is an ongoing post where I am exploring different aspects of breakout trading.
Firstly I look at a qualifying leg and how it impacts what comes next.
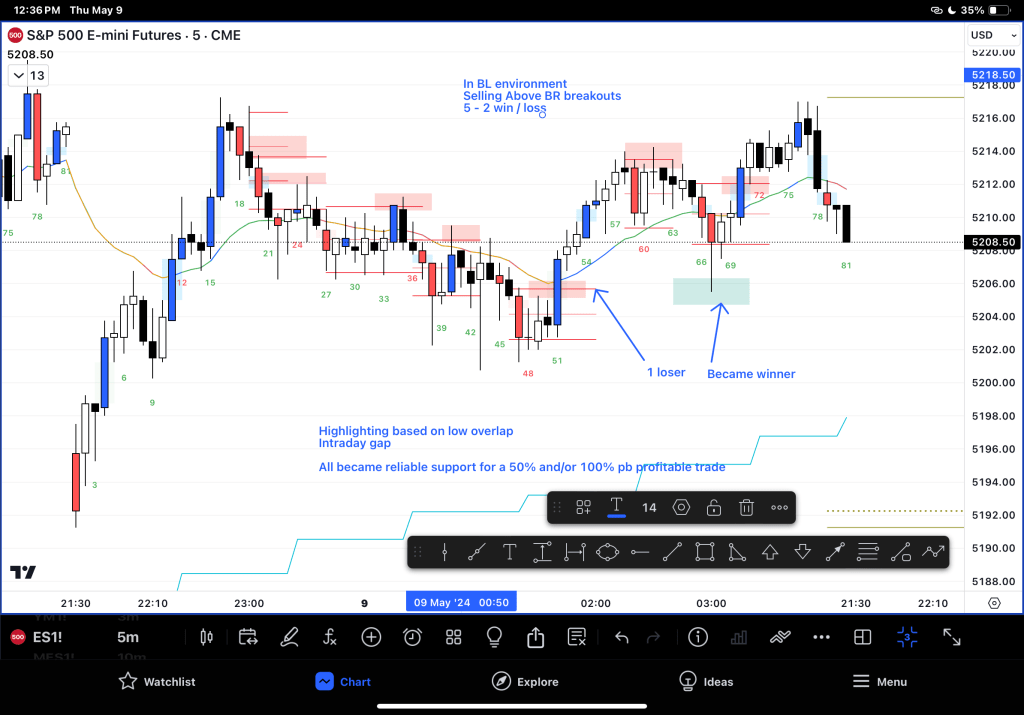
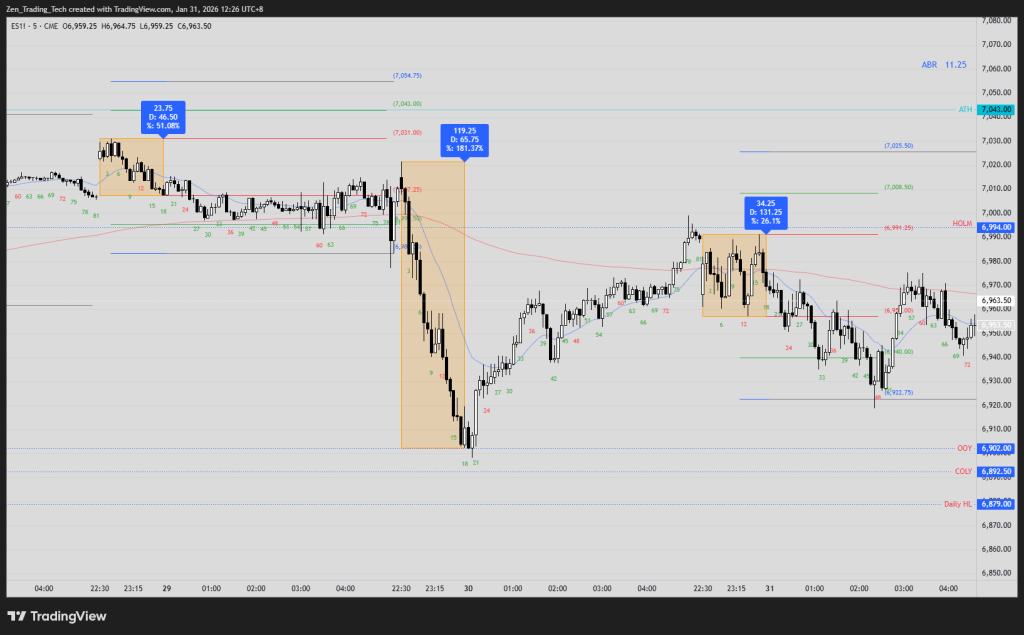
Secondly I look at breakout gaps (low overlap with prior bar) as a micro-guide to the qualifying leg concept above.
Lastly I review micro-gaps: Gaps between bars 1 and 3.
1. Looking for qualifying legs
– Momentum is very clear in hindsight. But it can be trained live to take high % trades.
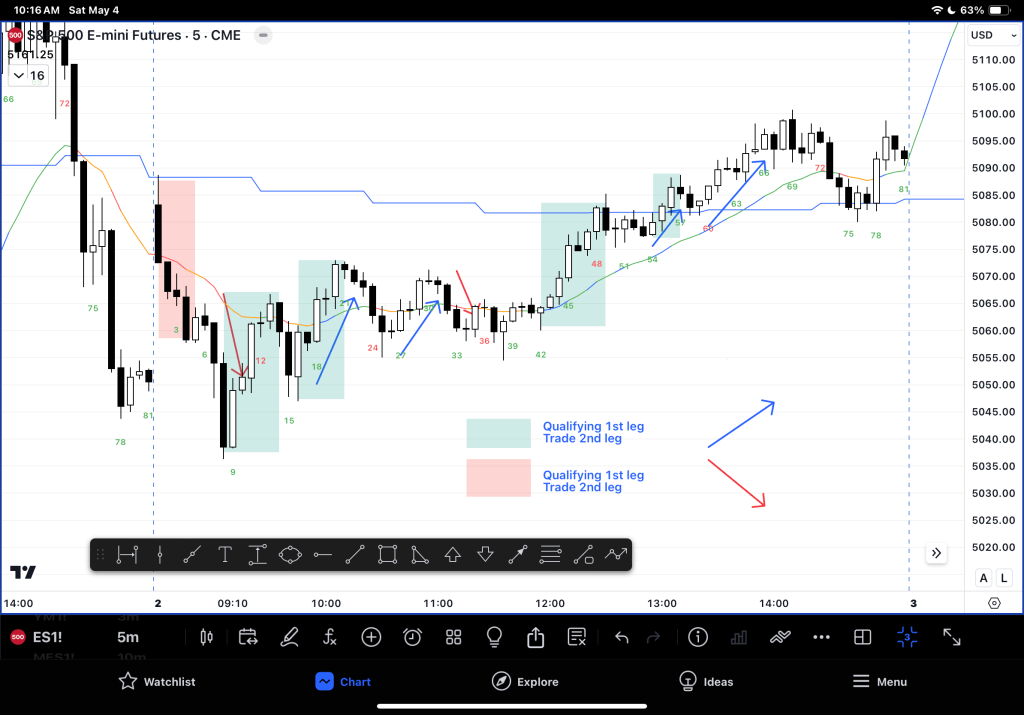
– Deciding who has the stronger BO / momentum is helpful in positioning for the next move.
– Below the BL BO failed – take a loss and get short. The two high % short trades covered your loss and back to profit.
2. What about overlap?
– The above is helpful for swing trading and positioning.
– What if we could determine it on a faster basis for high frequency scalping?
– Scalping on the 5min chart is just swing trading on a faster chart like 10 seconds! 🙂
– Could we highlight bars which have the least amount of overlap with the prior bar and determine a trading strategy based off that?
– Code link here
Example 1: BTC
– To start with BTC of good bull bars and STC of god bear bars should yield about 60% hit rate
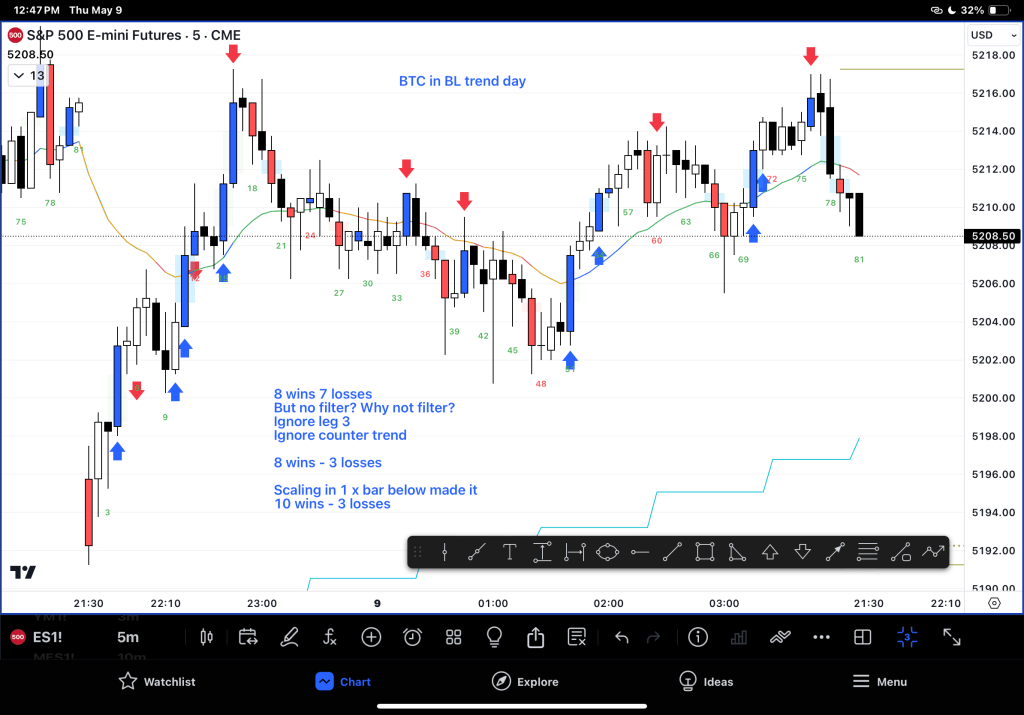
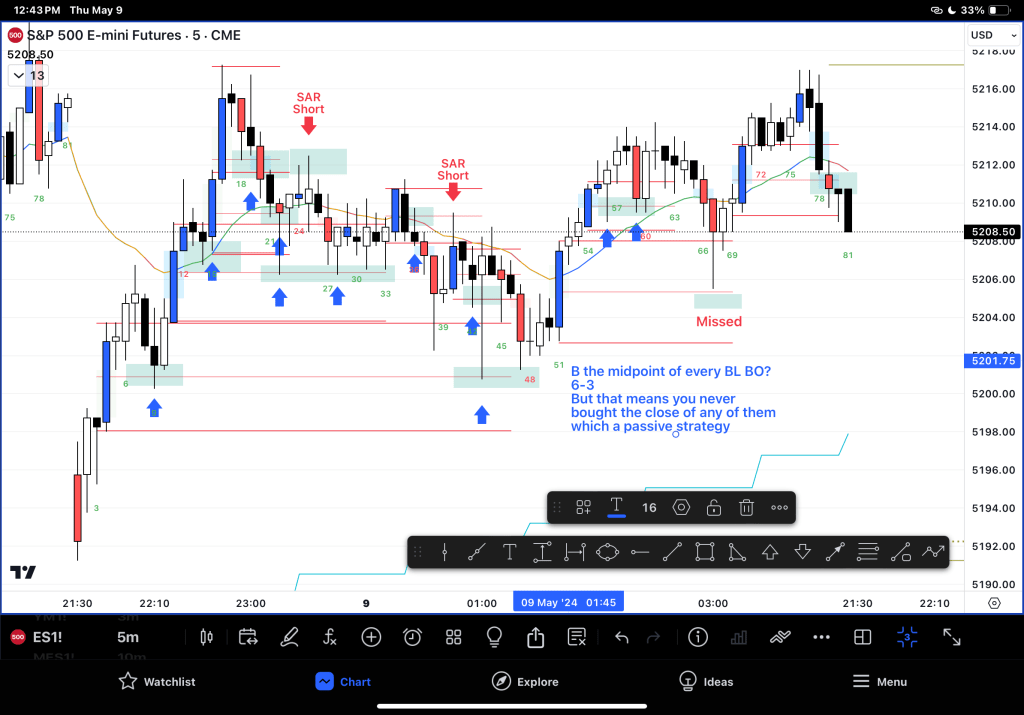
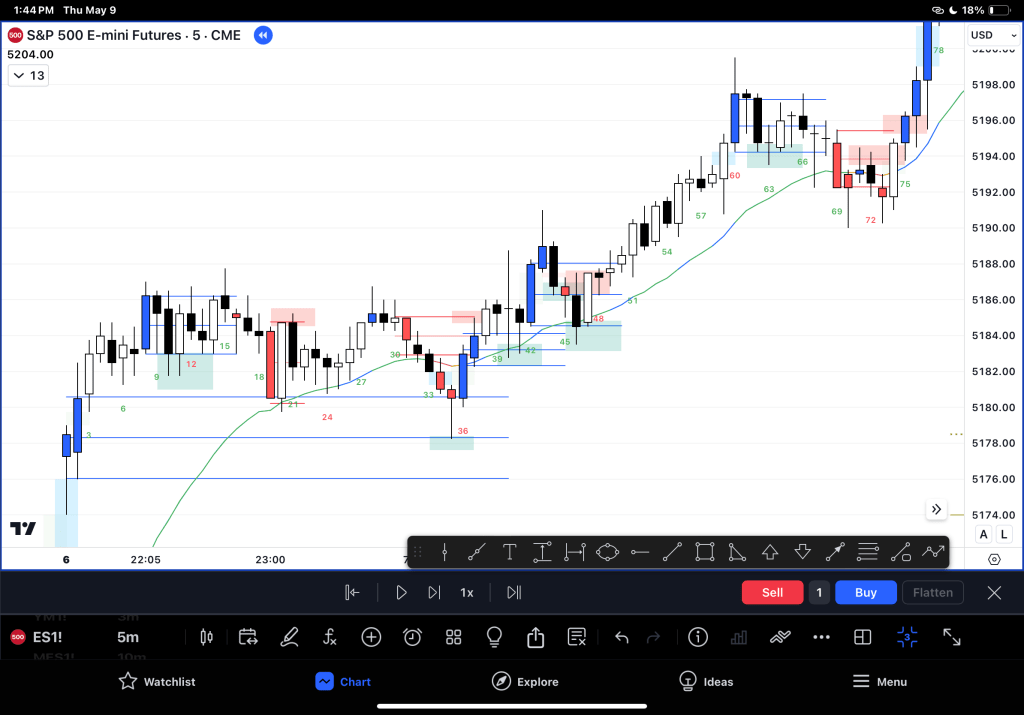
Example 1: Use BO Gaps for entries
– So now we have to filter out the weaker setups. We will look at the blue breakouts as potentially support (if BLBO) and resistance (if BRBO.)
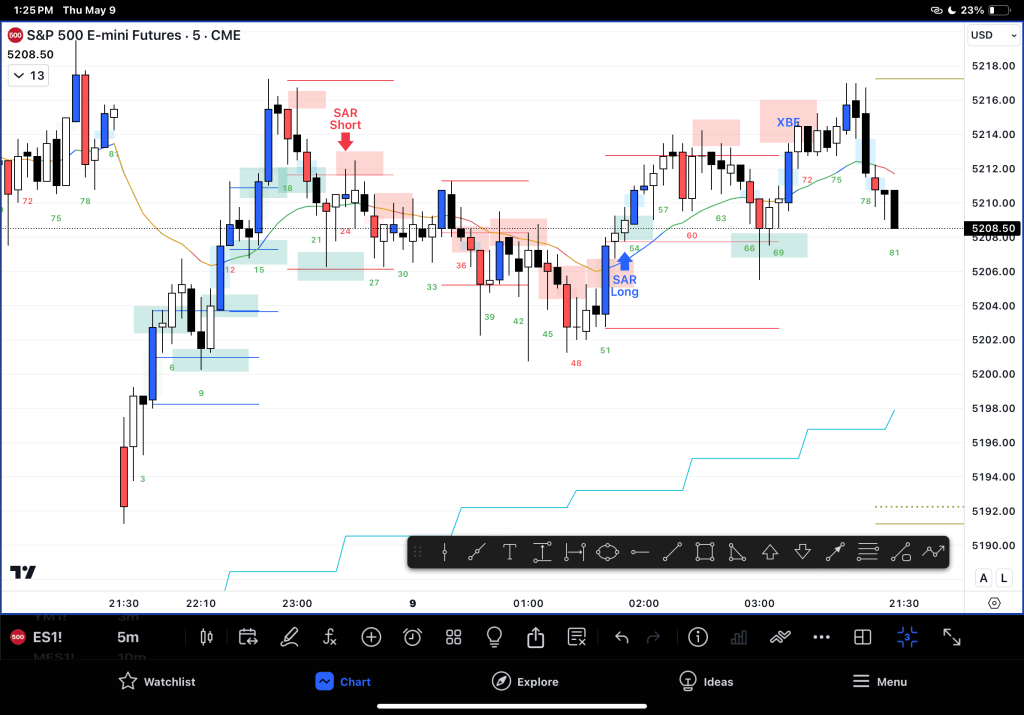
– Above example, if Always in Long, buy and buy mid and buy below. Don’t sell below anything until reversal is clear B21. Then sell above was best
– For comparison, the same day but trying to do the bear version of it worked very well… hmm.. unexpected!
– And to be fair, nearly every loss became a strong opposite trade to win it back if you stayed at the chart…
Learnings:
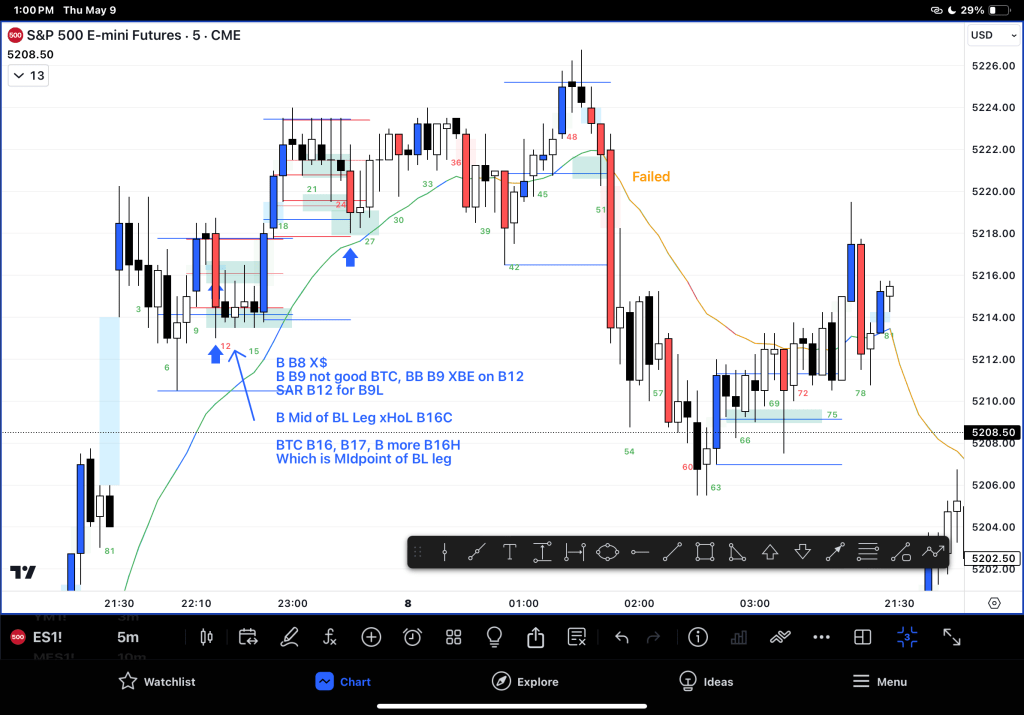
– Good BTC entries are followed by good Buy midpoint entries at gap areas (non overlap)
– When Buy Below entries occur, either it is strong as in a Microchannel (MC) or late so TR price action is starting
– Failure of the midpoint entry (if not late leg or far away from swing point based on x bars) is a sign of a reversal (or at least a 2 legged pullback)
– Possible trading strategies could be BTC 1/2 size and then add 1/2 midpoint.
– Buying below strong BL bars in AIL environment had 80% hit rate… which is why they are rare I guess…. If I was short why would I hold all the way there!
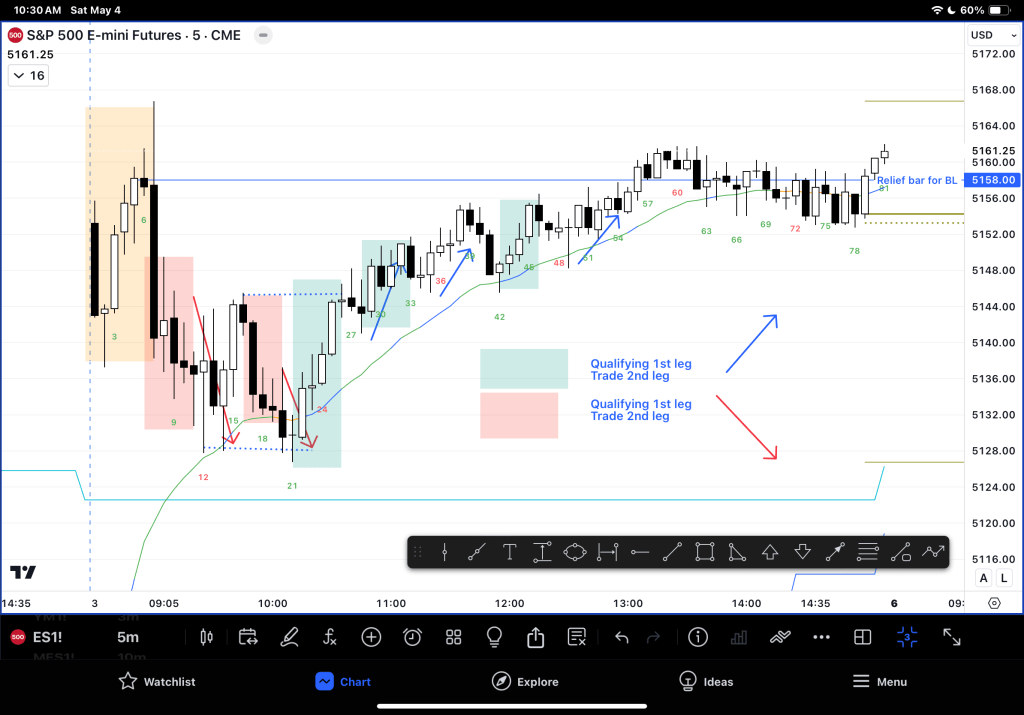
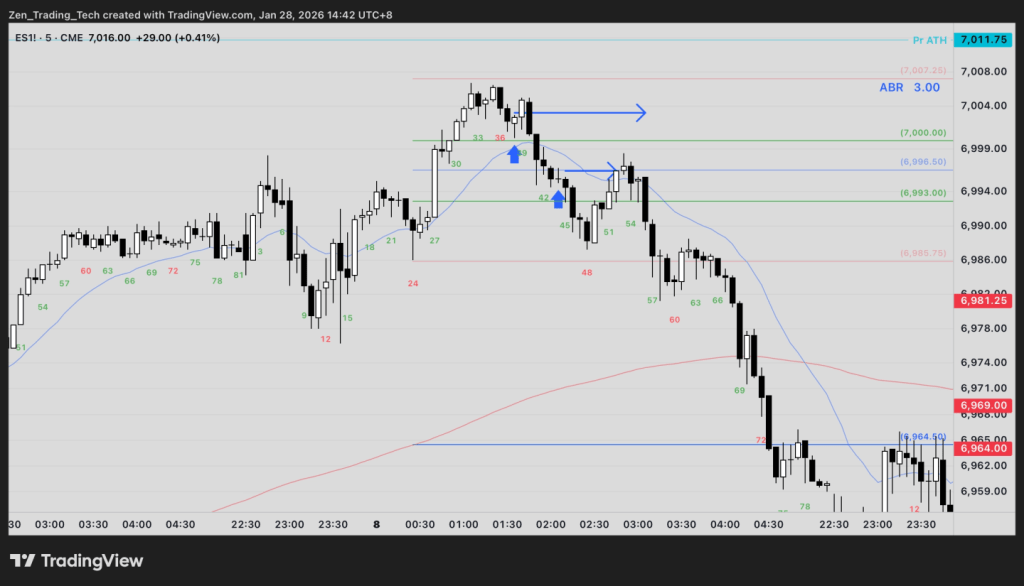
Example 2: Buy the midpoint of the Leg not just bar
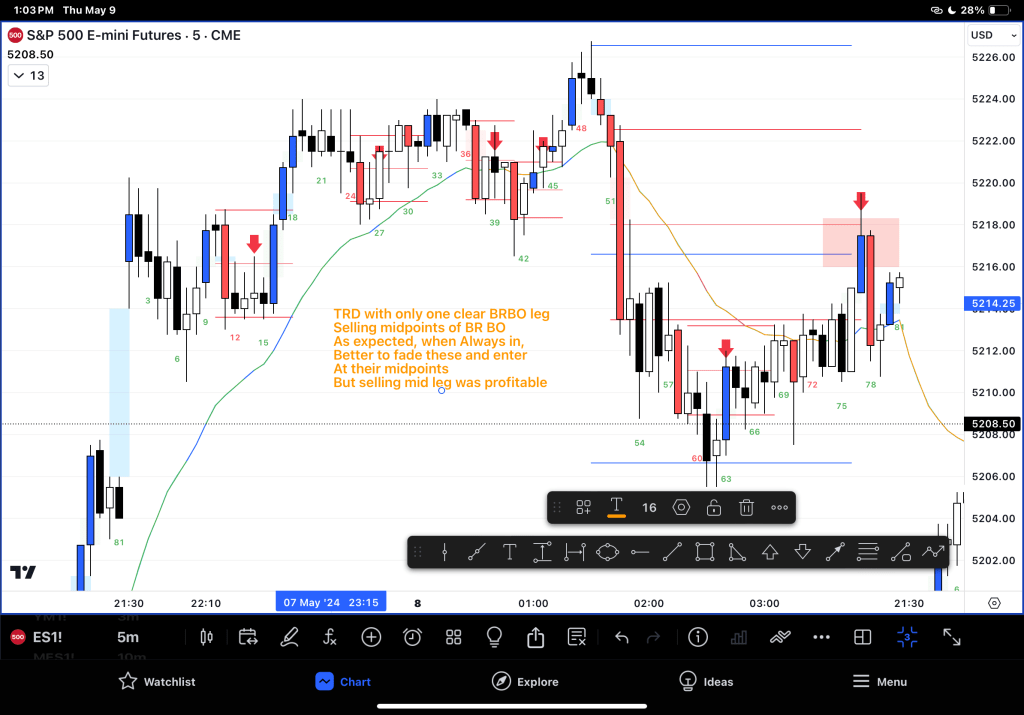
– Triangle open, so TR, better to BLSHS and take quick profits
– That means the BTC and take one bar profit was very good today – waiting didn’t work
– Buying midpoint of the leg did work today – more trading range style
– Buying midpoint of bar worked for very fast scalps – execution errors will increase
– Interesting when the buying the midpoint of the leg failed, it was a strong reversal – so AIS – as we see below
Example 3: Combination! Unrealistic… Model Trading

Another Example
– Tough to lose money buying unless you were managing it too quickly and had shorter stops.
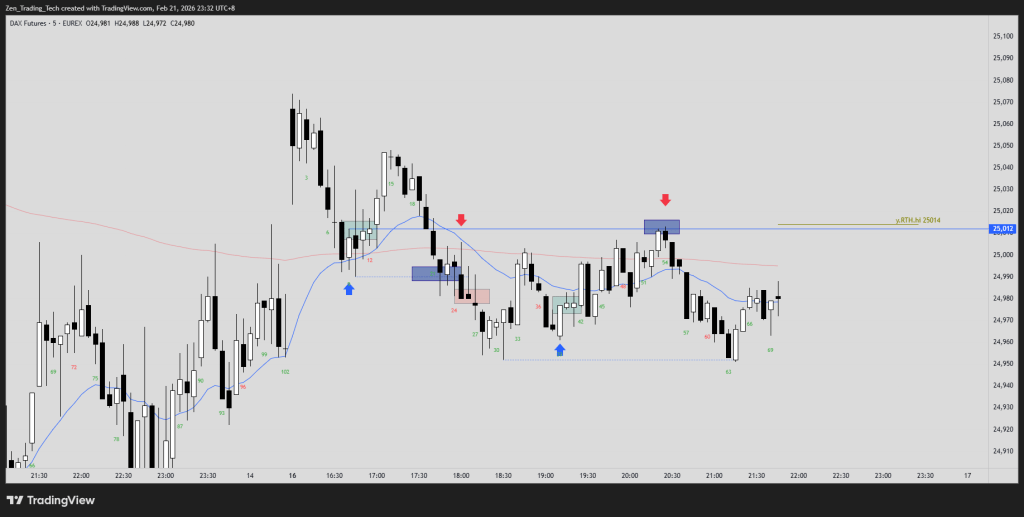
– Moving average great place to scale in
Where to from here?
– Strong breakouts create gaps. Gaps act as support / resistance for secondary trades.
– When they fail, they often lead to breakeven exits, and high % counter trend entry (2nd leg of a 2 leg pullback for example)
– Seeing high % trades fail give an even higher % for an entry when you are flat.
– Moving Average can help, but I need to research further.
Homework:
– Research using areas of low overlap for limit order scalps.
– Avoid big stops and scaling in, during legs 2 and 3.
– How fast can you switch?
– Practice markups and finding further details on how to stay in longer


Leave a reply to Tim Fairweather Cancel reply