Video
- Video
- Intro
- Index
- B STP 60m B1
- B STP 60m B1 – Dis
- B STP 60m B2
- B STP 60m B2 – Dis
- S STP 60m B1
- S STP 60m B1 – Dis
- S STP 60m B2
- S STP 60m B2 – Dis
Intro
Welcome to the exciting world of ES price action trading!
If you’re like me, you’re always on the lookout for new ways to up your trading game.
One trick I’ve found incredibly useful is using 60-minute bars to guide my trades on the 5-minute chart.
It might sound a bit complicated, but it’s really about getting a bigger picture of what’s going on in the market. By zooming out to the 60-minute bars, we can spot trends and key levels that aren’t as obvious on the 5-minute chart.
Index
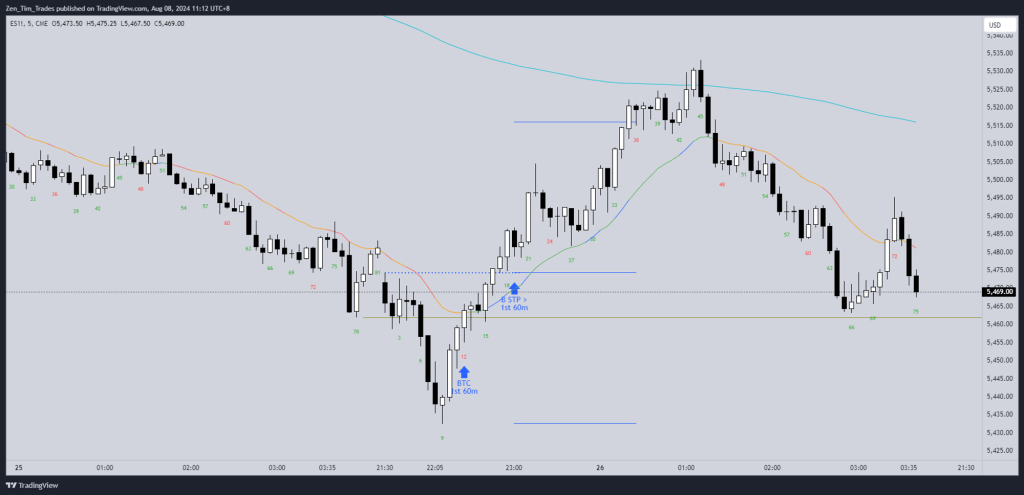
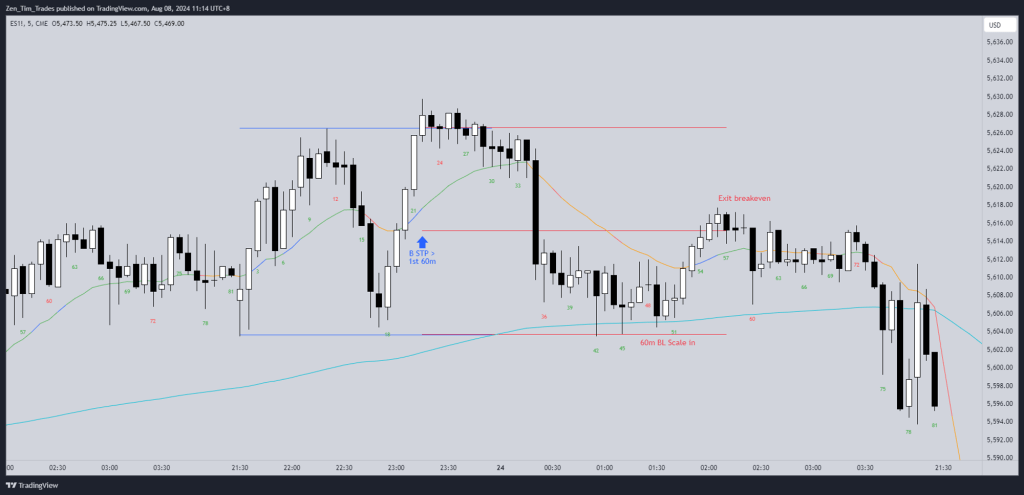
B STP 60m B1 (Buy on a stop 1 tick above the first 60m bar)
B STP 60m B1 – Dis (Then got disappointed)
B STP 60m B2
B STP 60m B2 – Dis
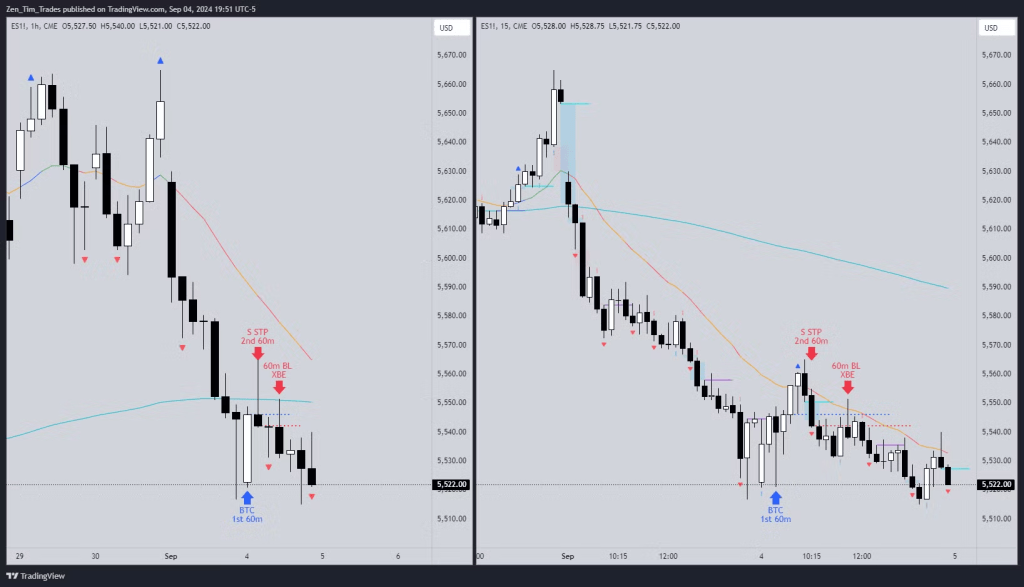
S STP 60m B1 (Sell on a stop 1 tick below the first 60m bar)
S STP 60m B1 – Dis
S STP 60m B2
S STP 60m B2 – Dis
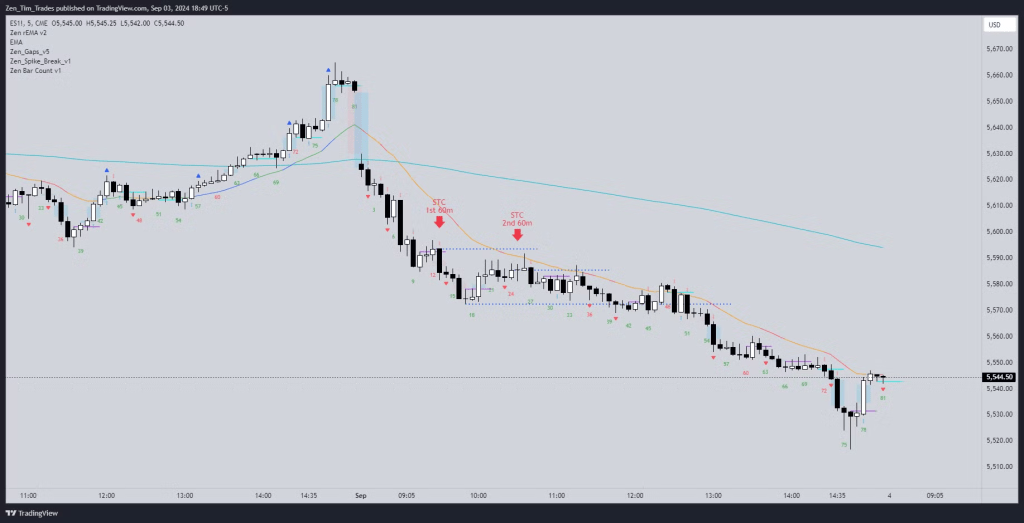
B STP 60m B1
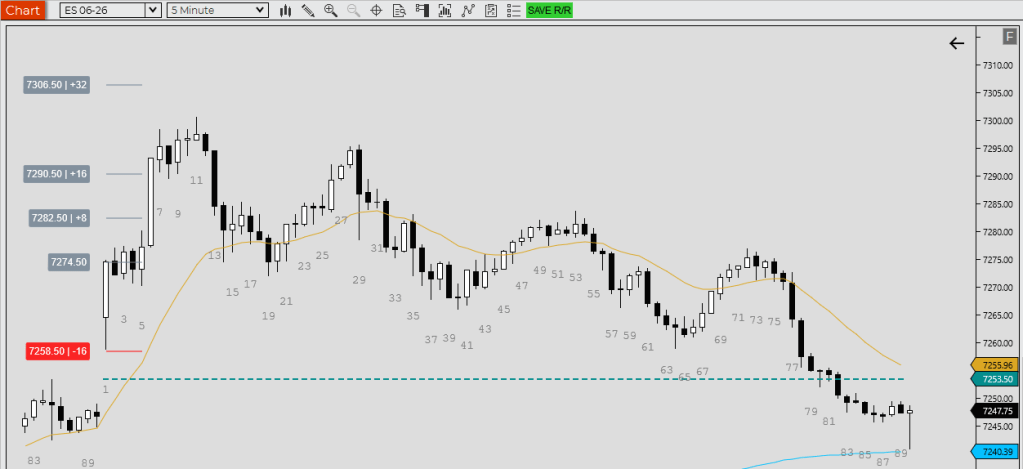
- 1st 60m bar, buying above was trade of the day
B STP 60m B1 – Dis
- Buying above that bar but then strong reversal – it needed a scale in below
B STP 60m B2
- Buying above the 2nd 60m bar was the trade of the day

B STP 60m B2 – Dis
- 60m bears sold the 2nd bar, get disappointed so you buy with them
S STP 60m B1
- Selling under the 1st 60m bar


S STP 60m B1 – Dis
- Selling under the 1st 60m bar but you get disappointed

S STP 60m B2
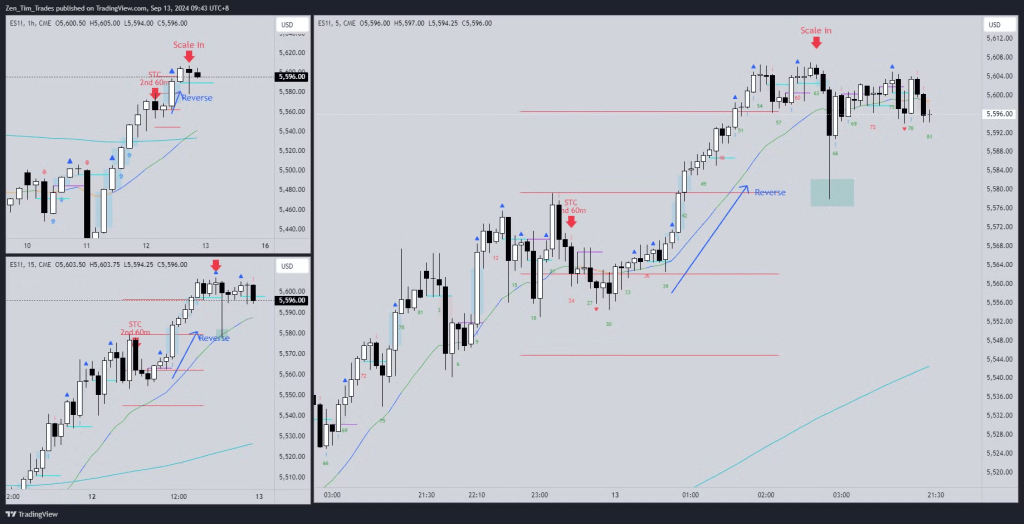
- Sell under the 60m follow-through bar
S STP 60m B2 – Dis
- Selling under the 2nd 60m bar but you get disappointed


Leave a comment