- Intro
- Assumed Knowledge
- Video
- What is a High 2?
- Drill #1: Marking all the High 2
- Not all High 2’s are good to trade
- Drill #2: Strong H2 vs Weak H2
- Trendlines
- Drill #3: Did the High 2 break a trendline?
- High 2 is a second entry
- Drill #4: High 2 is a Second Entry
- High 2 is after the other side has failed twice to reverse
- Drill #5: High 2 after 2 attempts to reverse fail
- High 2 Fail -> Measured Move Down
- Drill #6: High 2 Fails -> MM Down
- Conclusion
Intro
- Talk about High 2 and how to trade
- Reverse it all for the BEAR case and a Low 1
Assumed Knowledge
- Spikes
- Consecutive bars – indicator
- Stop entries indicator and video
- Pullbacks / 2-Legged Pullbacks videos
- Check out Al Brooks book – Trading Ranges for more details on bar counting
- Also my video here on Bar Counting
- 2 Legged pullback after a spike
Video
What is a High 2?
- Go up and we pull back below the low of a prior bar. That is the end of a leg.
- When we go above the high of a prior bar now we call it a High 1.
- If we don’t come back down again keep counting High 1.
- If it goes below that bar and then reverses up we call it a High 2.
- You can continue for H3, H4, etc
- We will focus on High 2 because the market often moves in 2 legs.
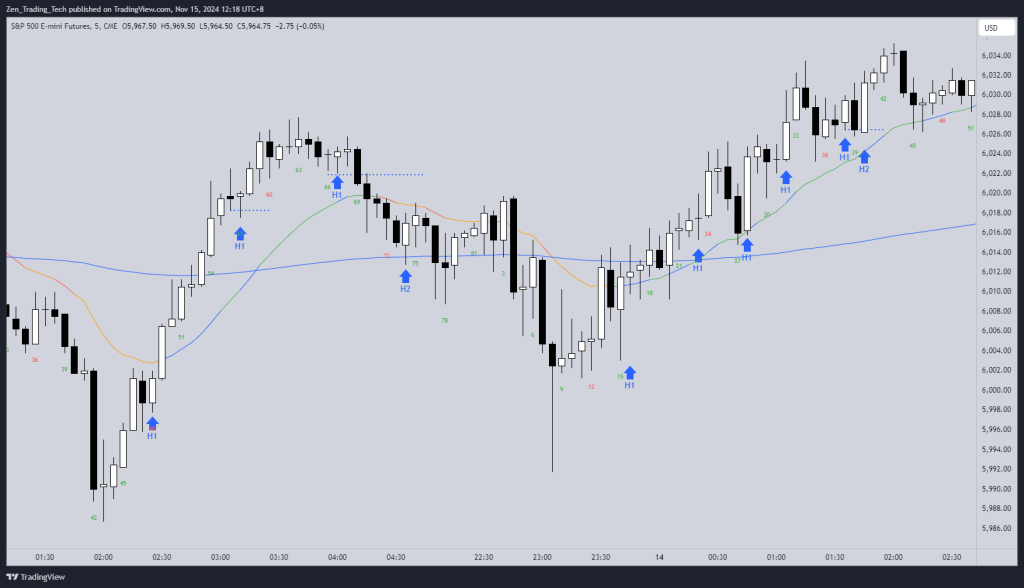
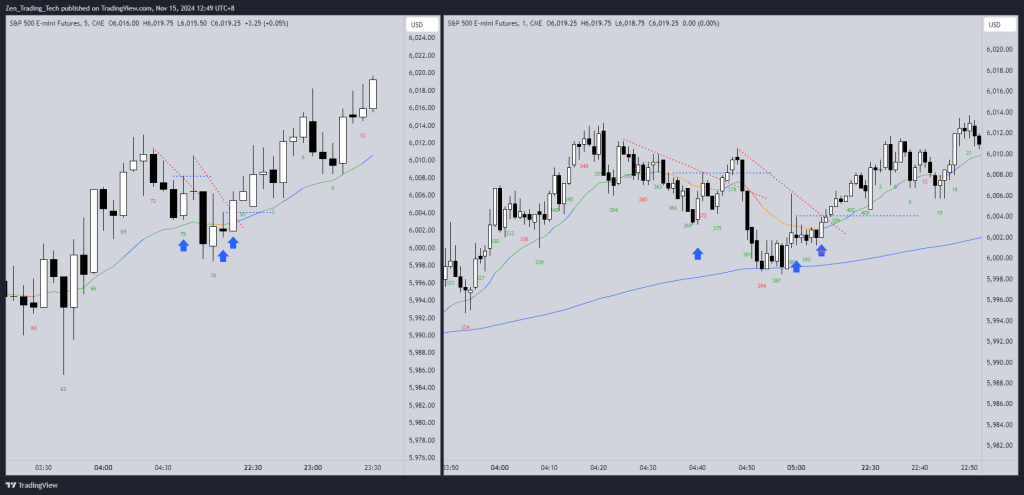
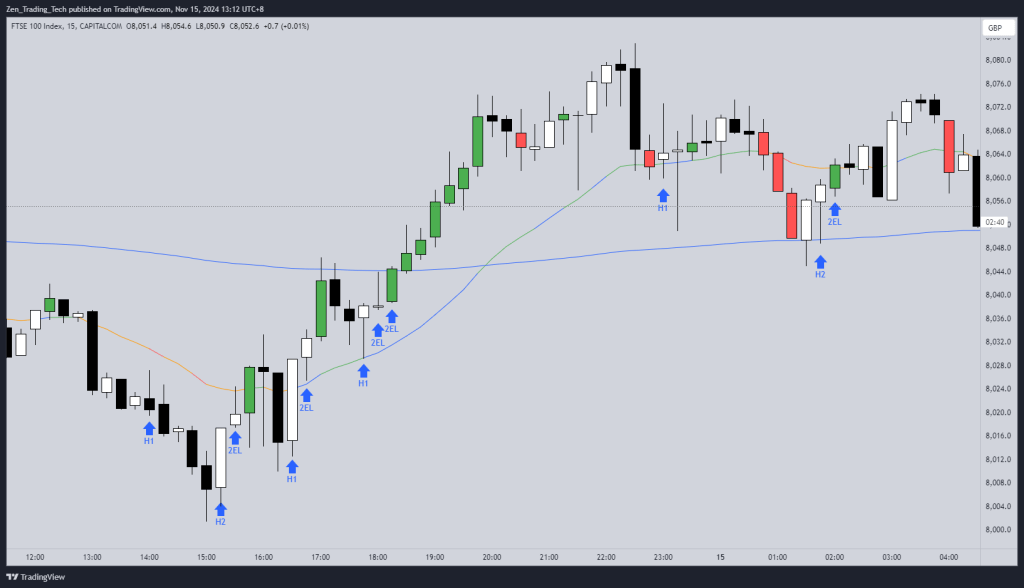
Drill #1: Marking all the High 2
- Look for a breakout / spike and then once a bar goes below the low of a prior bar, the next time we go above the high of a prior bar is a High 1. If we then resume down and repeat it – we call it a High 2
- Mark the bar that GOES ABOVE – that is the High 2 bar
Not all High 2’s are good to trade
- You will notice some High 2 are going above a bear bar – this is not as reliable as going above a bull bar
- All High 2’s form as the market is going down – after going up before!
- But it would be better if there were already BULLS in the market before we buy as well!
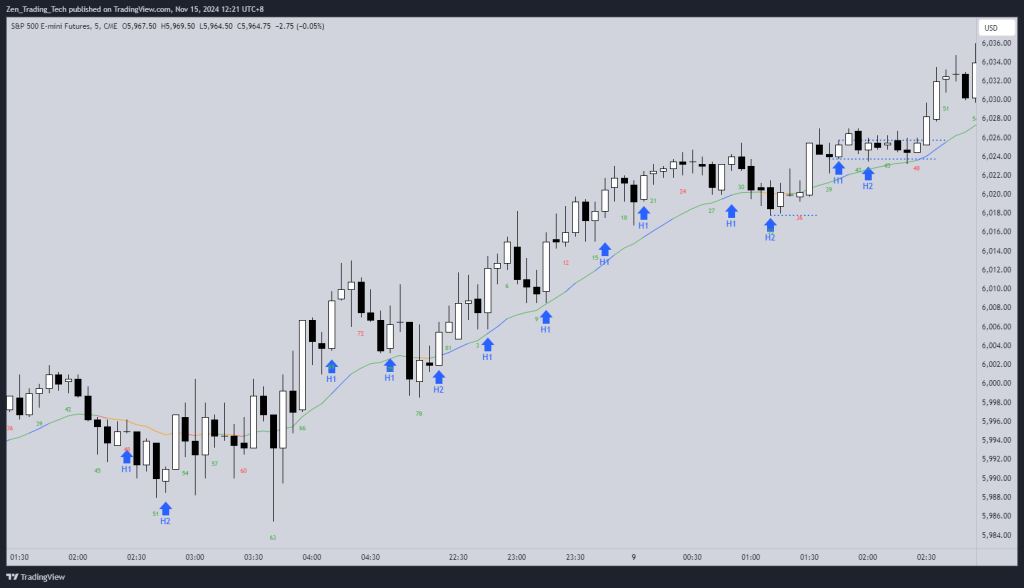
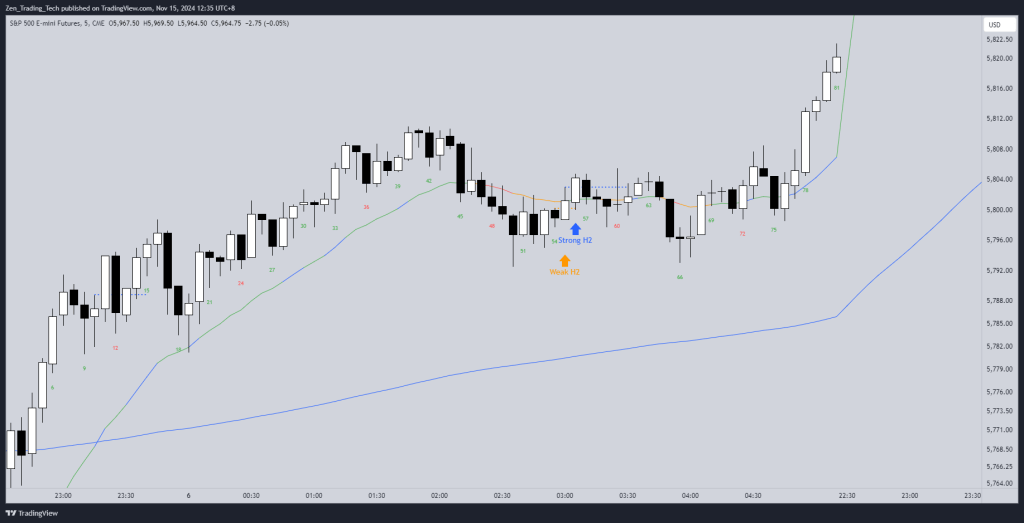
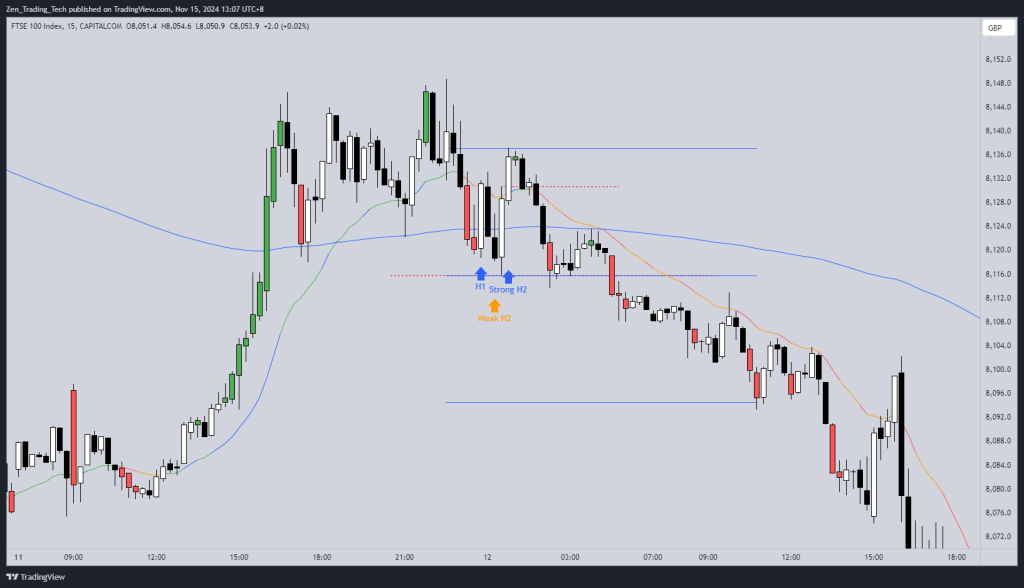
Drill #2: Strong H2 vs Weak H2
- Ignore market structure
- High 2 above a Bull Bar is higher probability
- Now look for High 2 but look a bar or so later to identify the first time it goes


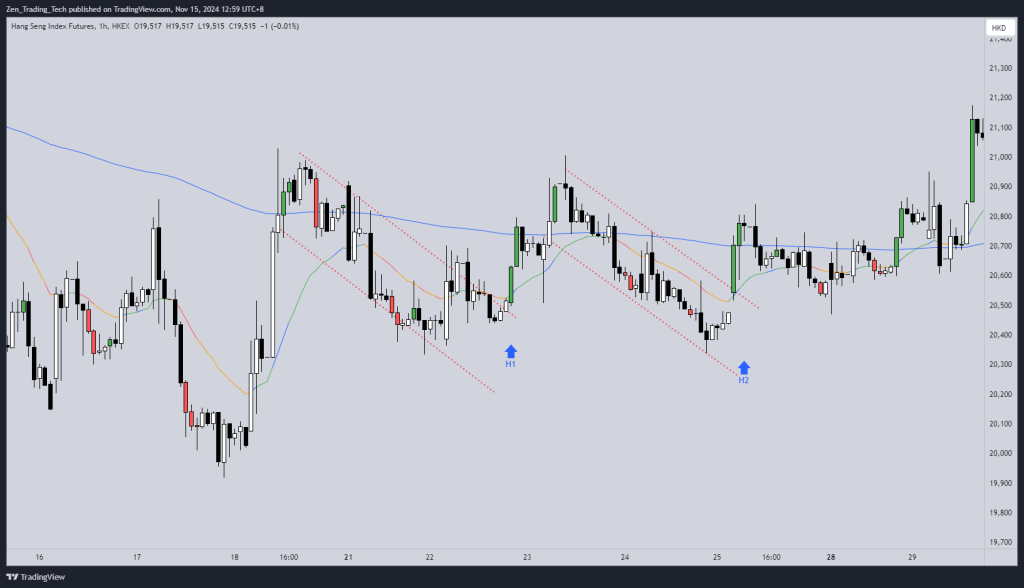
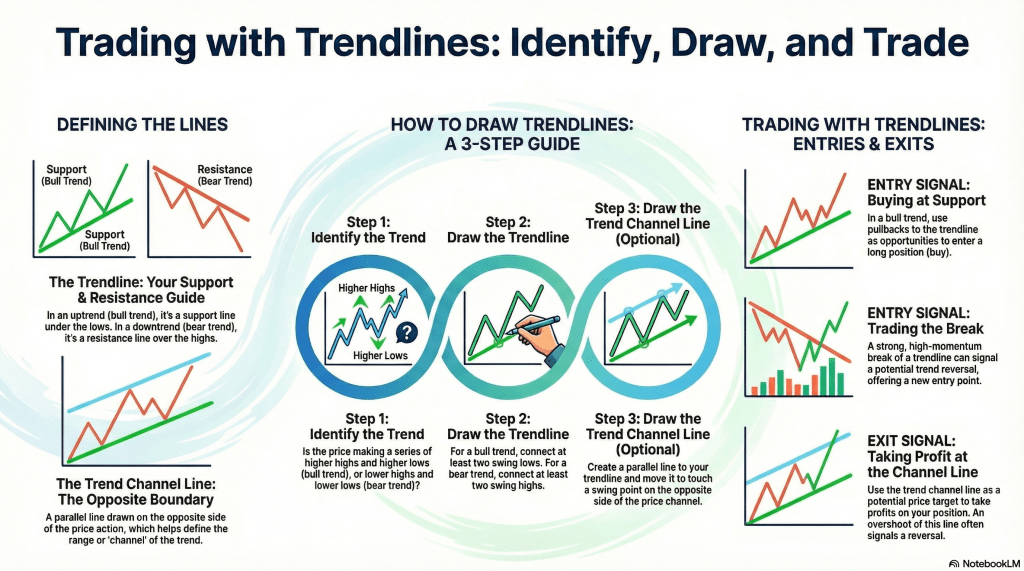
Trendlines
- You will have noticed above – without the concept of trendlines it can get ridiculous.
- High 1’s and High 2’s break very small trendlines.
- Connect Highs of bear moves for bear trendlines.
- This prevents us from buying very high in a bear spike, because the trendline was never broken.
- See here how it didn’t break any trend line
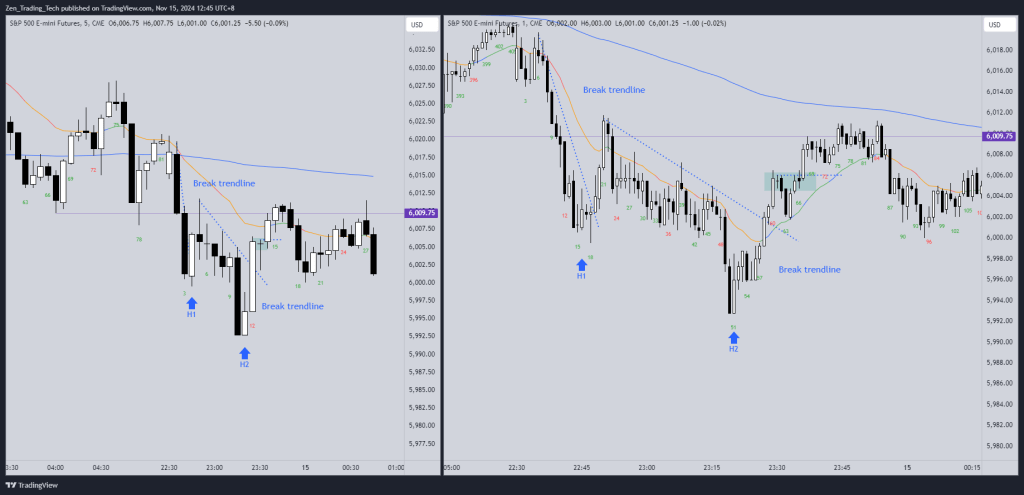
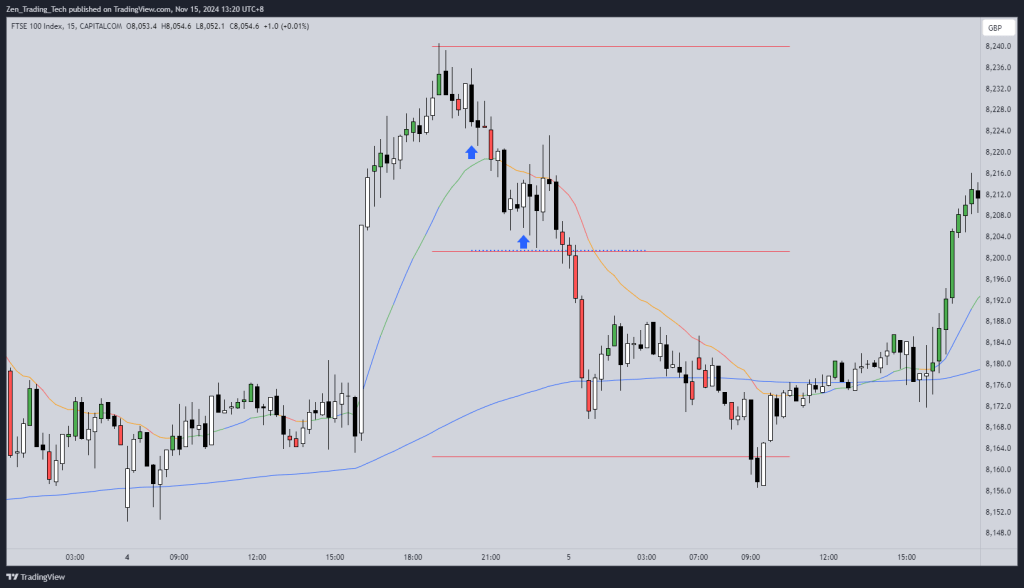
Drill #3: Did the High 2 break a trendline?
- Look at the structure and see if it broke anything significant
- Ask yourself how does this change your understanding of a High 2?
- How can you start to use the higher time frames to find good entries
High 2 is a second entry
- So now in the drills you can see there are god signals and better signals
- As a trader becomes more familiar with the High 2 concept you start to use it as a way to practice patience.
- The High 2 is the second entry after the High 1. This sounds similar but can lead to greater agility in trading.
- So if you see a bad High 1, the next entry is a High 2.
- The second best entry after the High 1 triggers
- See the chart below
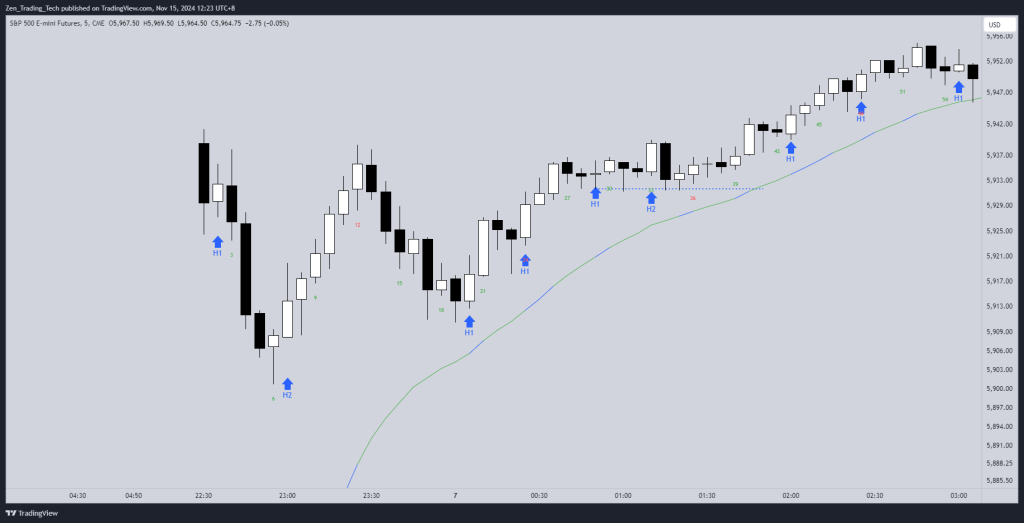
Drill #4: High 2 is a Second Entry
- Now your turn! Practice identifying the second best entry after the High 1 triggers
- You can also find H2 that are weak and take the next signal
High 2 is after the other side has failed twice to reverse
- As a trader becomes more familiar with the High 2 concept you start to use it as a way to practice patience.
- The High 2 is the second entry after the High 1. This sounds similar but can lead to greater agility in trading.
- The exactness of the bars, gives way to a feeling of the price action.
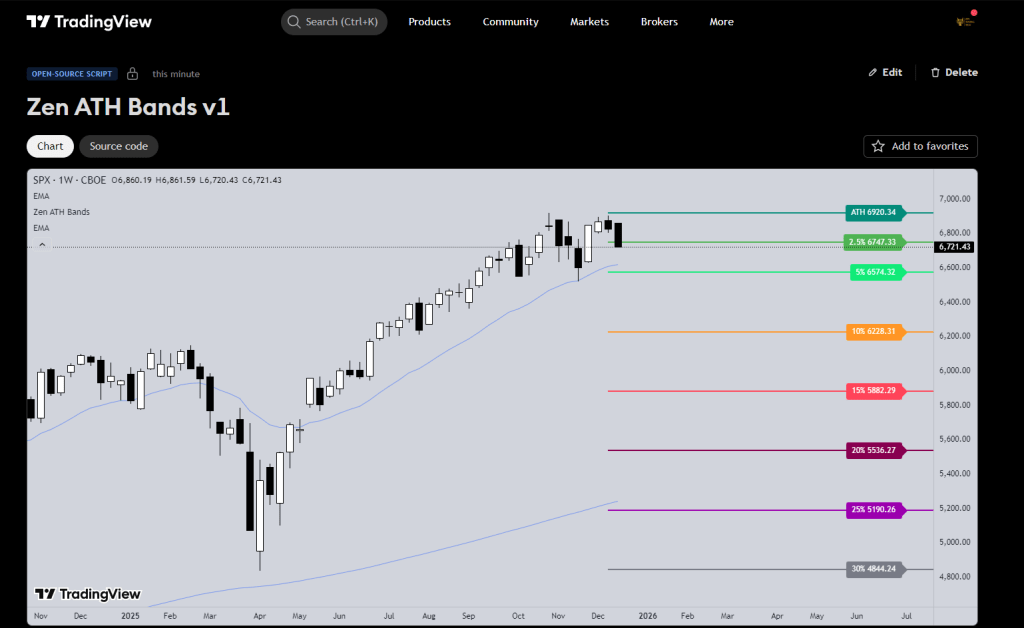
- The High 2 has a relationship to the Higher time frame
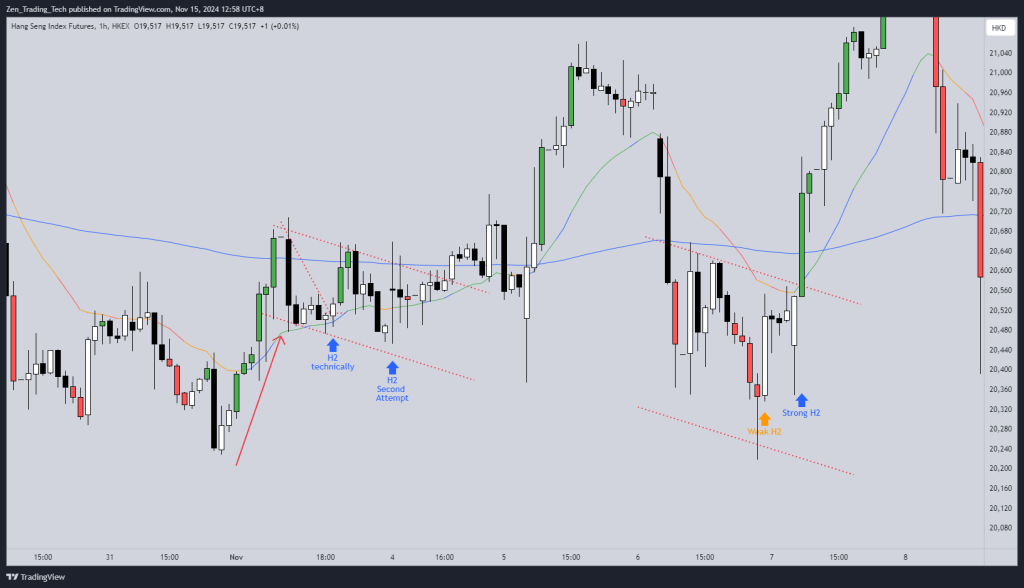
Drill #5: High 2 after 2 attempts to reverse fail
- Now your turn to find High 2’s based on a feeling of the chart – including the higher time frame
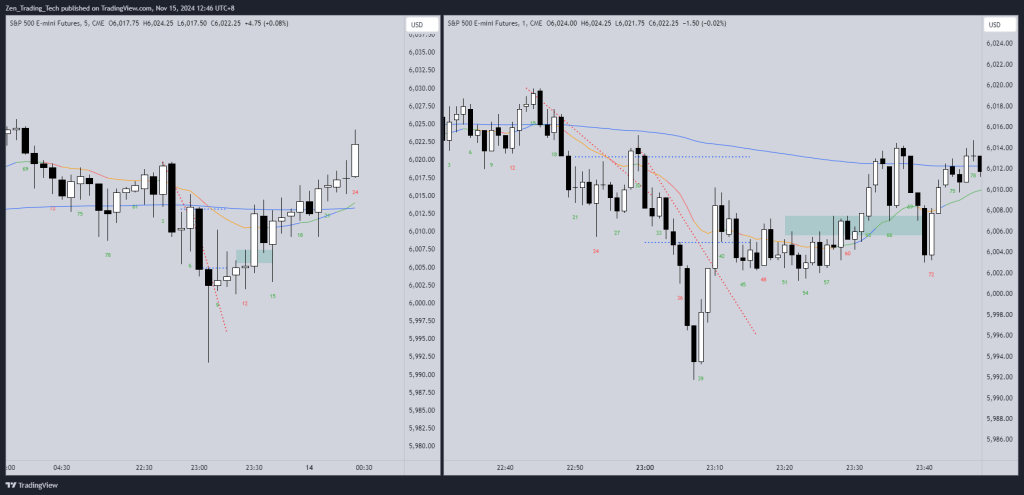
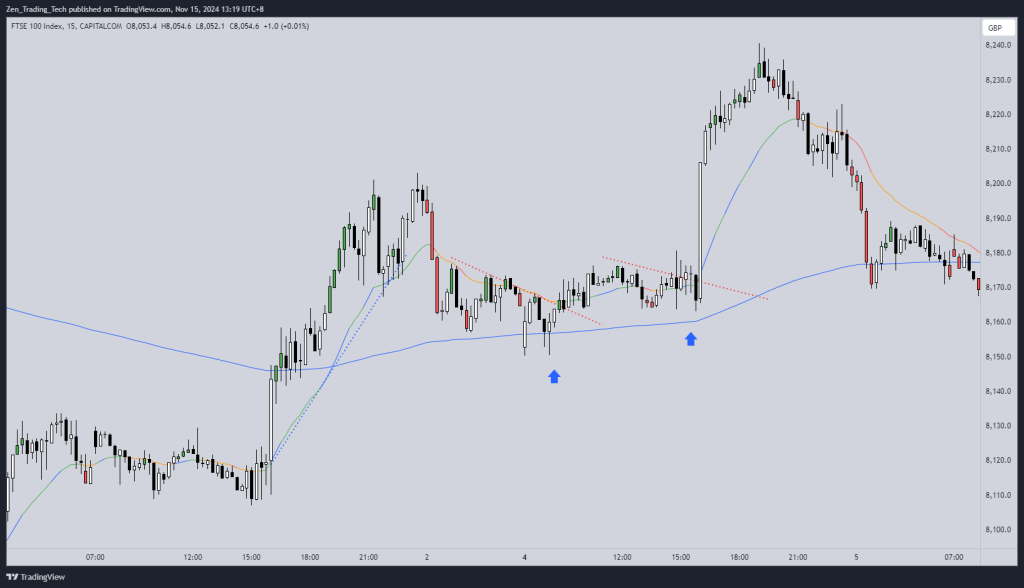
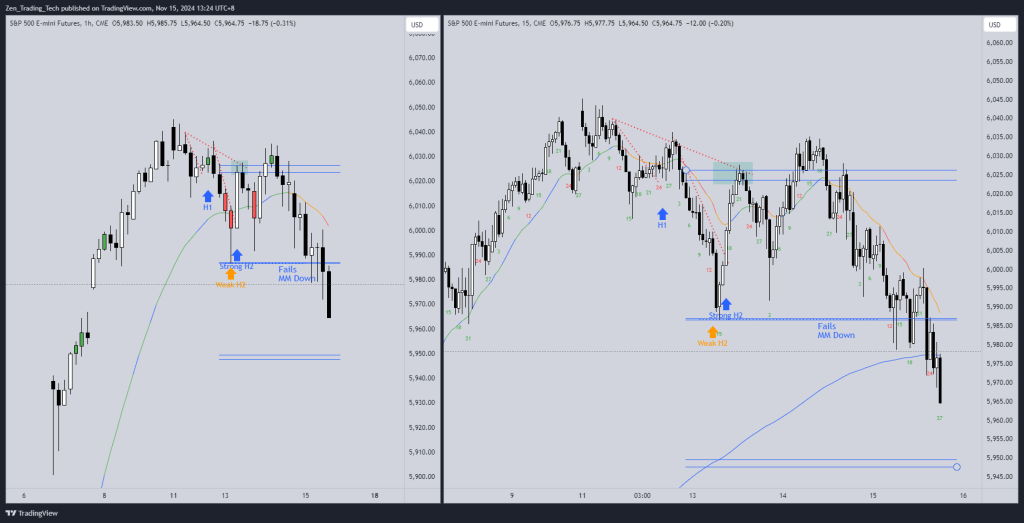
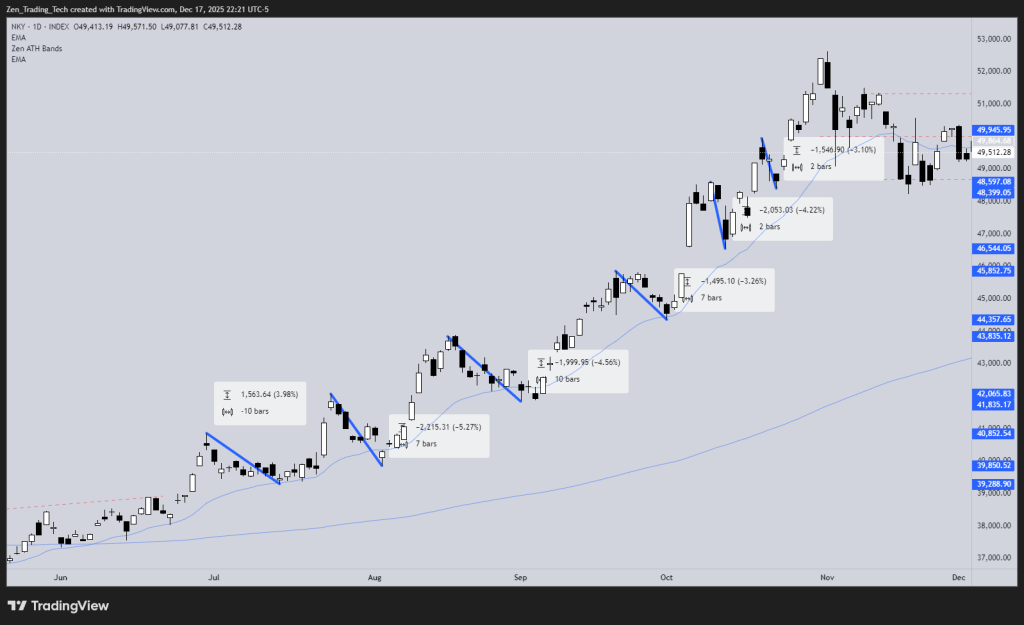
High 2 Fail -> Measured Move Down
- Once the second attempt fails it can often lead to a measured move down
- Sometimes the entry for the High 2 is just too high for traders to be convinced
- High 2 after 2 attempts to reverse fail.
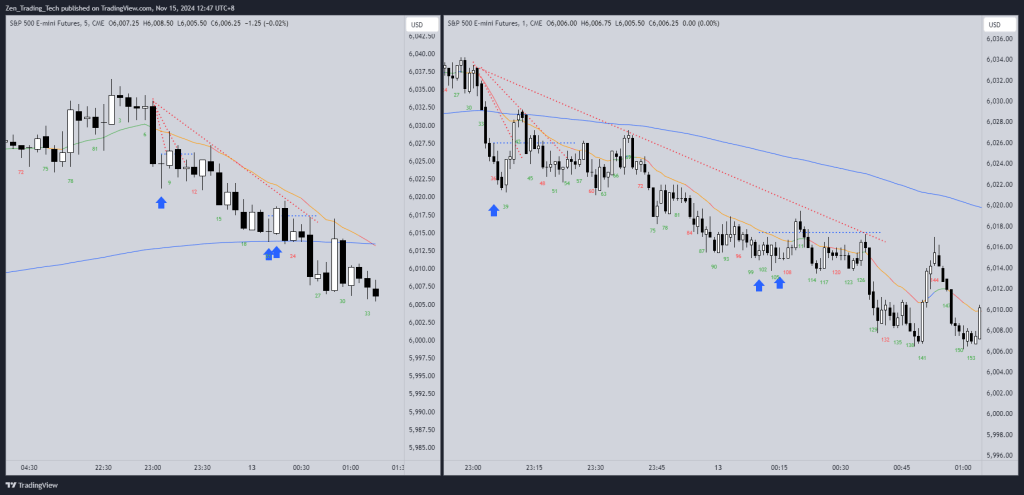
Drill #6: High 2 Fails -> MM Down
- Now find H2 that failed and created a MM down.
- Which worked and which did not?
Conclusion
- I hope you found that useful.
- Now you have several of the drills I do to trade High 2 entries
- Please let me know in the comments what you learned!


Leave a reply to ellie van hunsel Cancel reply