- Introduction
- High Probability Trade – Long Live the High 2!
- High Probability Trade Failed: 2nd Entry Long (H2) -> Test Target for later
- High Probability Trade Failed: Bear Microchannel Fade -> Test Target for later
- High Probability Trade Failed: 2nd Entry Short (L2) -> Test Target for later
- To be continued…!
Introduction
- Every trader has experienced this: you spot a textbook high probability setup, you take the trade, and it fails. The natural reaction is to take the loss and move on. But what if the failure itself is the setup?
- This is one of the most powerful concepts in Brooks Price Action — when a high probability trade fails, the failure becomes high probability in the opposite direction. More specifically, the market is likely to come back and test the price level where the failed trade occurred.
- The logic is simple. If a buy setup fails, the traders who bought are now trapped. They need to exit, and their exits create selling pressure. But the market also knows that level attracted buyers — so it becomes a magnet that price is likely to revisit. You lose on the first trade, you win on the reversal, and you often win again on the test. Lose, win, win.
- In this post (Part 1), we’ll walk through three common high probability setups and look at what happens when each one fails. In Part 2, we’ll take it further — what happens when the test itself fails? The failure of a failure.
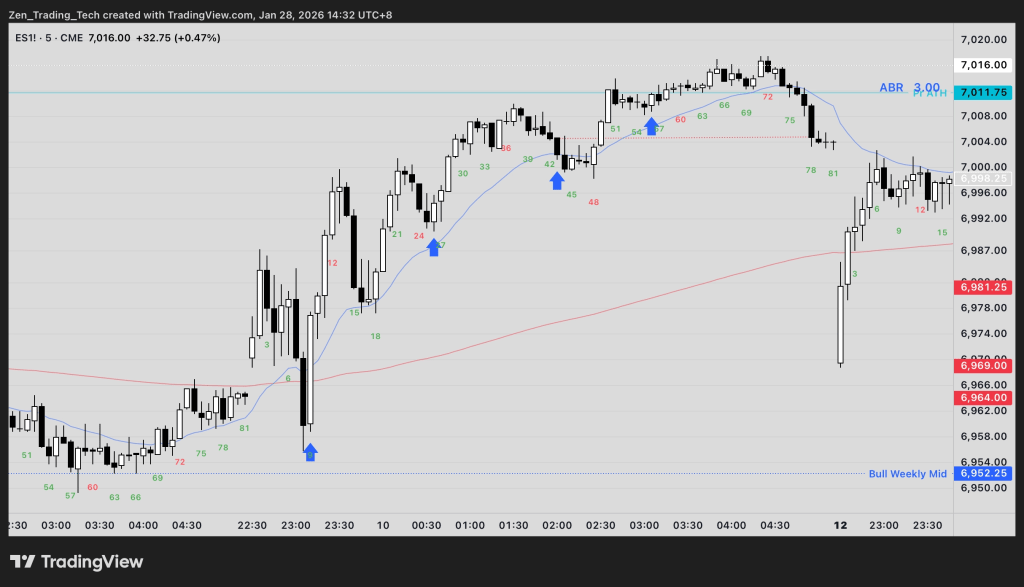
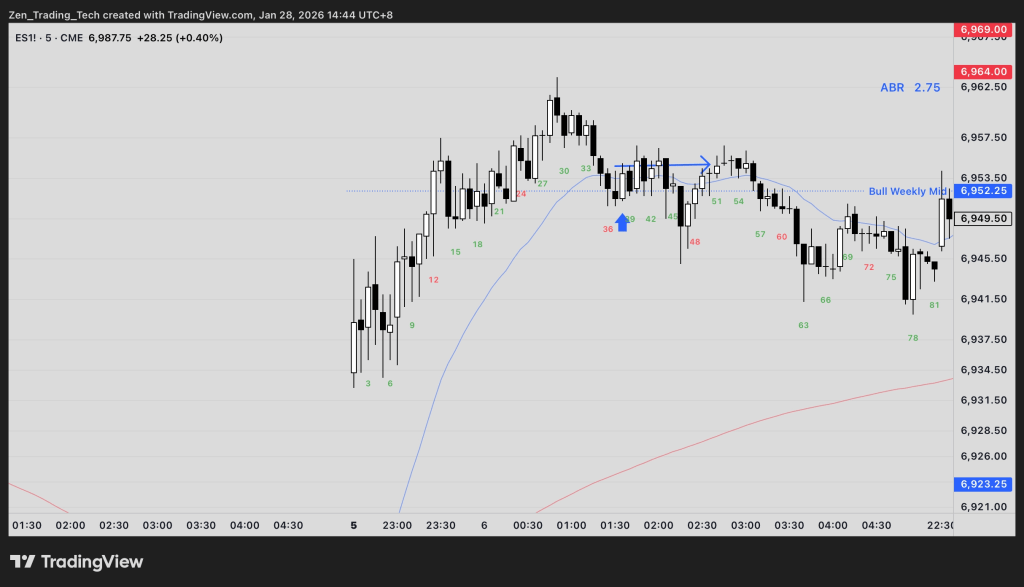
High Probability Trade – Long Live the High 2!
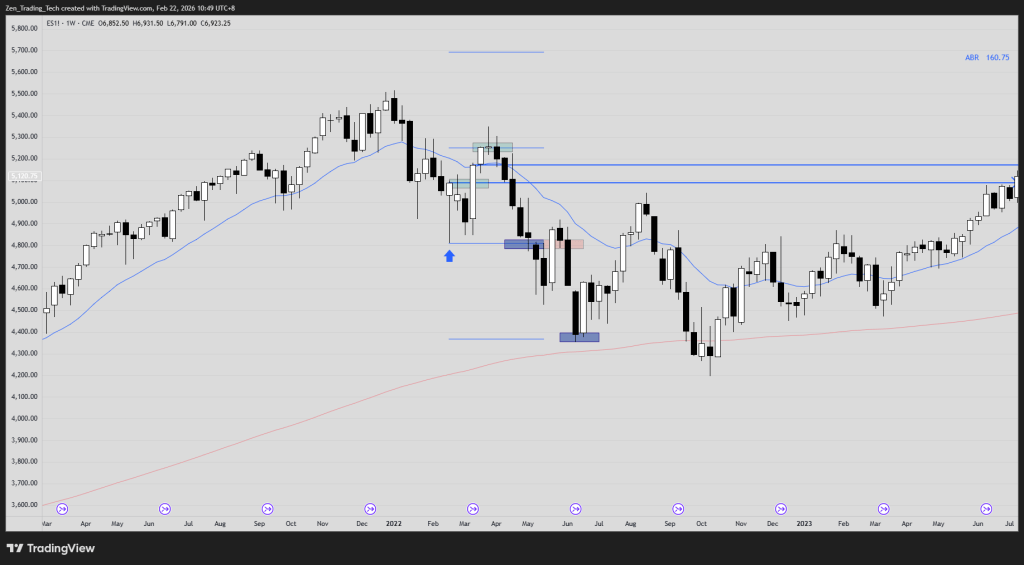
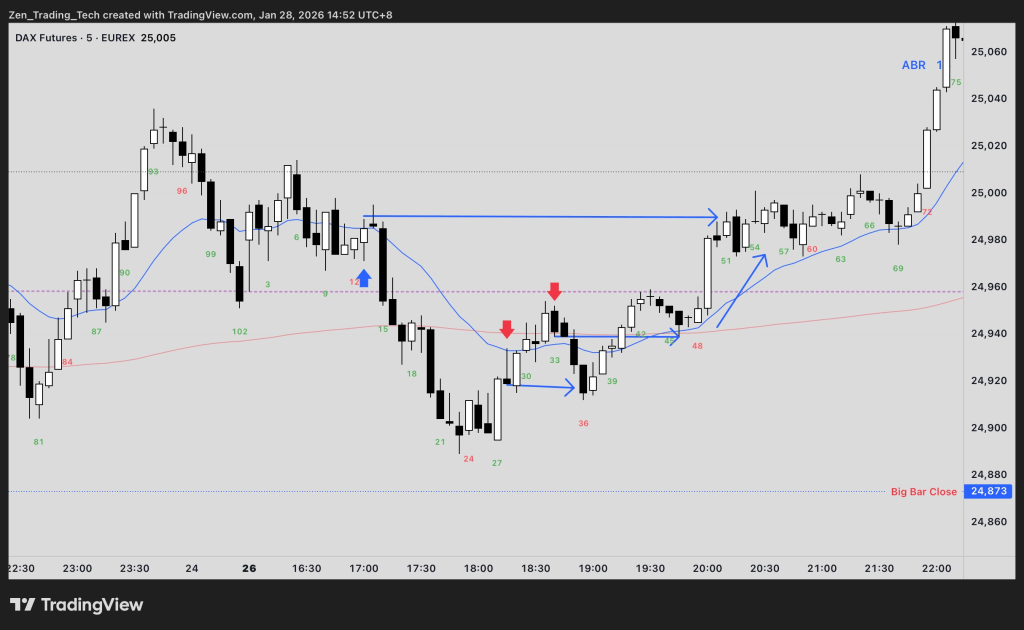
- Before we can talk about failures, we need to understand what a working high probability trade looks like. The High 2 (H2) is one of the most classic setups in Brooks Price Action — a second entry long in a bull trend or during a pullback to the moving average.
- The idea is straightforward. In a bull trend, the first pullback attracts buyers. If that pullback continues, those buyers are underwater but still hopeful. The second pullback — the H2 — brings in a fresh wave of buyers, and now you have two groups of longs who need the trade to work. That creates the buying pressure for the next leg up.
- When the context is right — bull trend, pullback to the EMA, decent signal bar — the H2 is about as reliable as it gets. But “reliable” doesn’t mean “always works.” So what happens when it doesn’t?
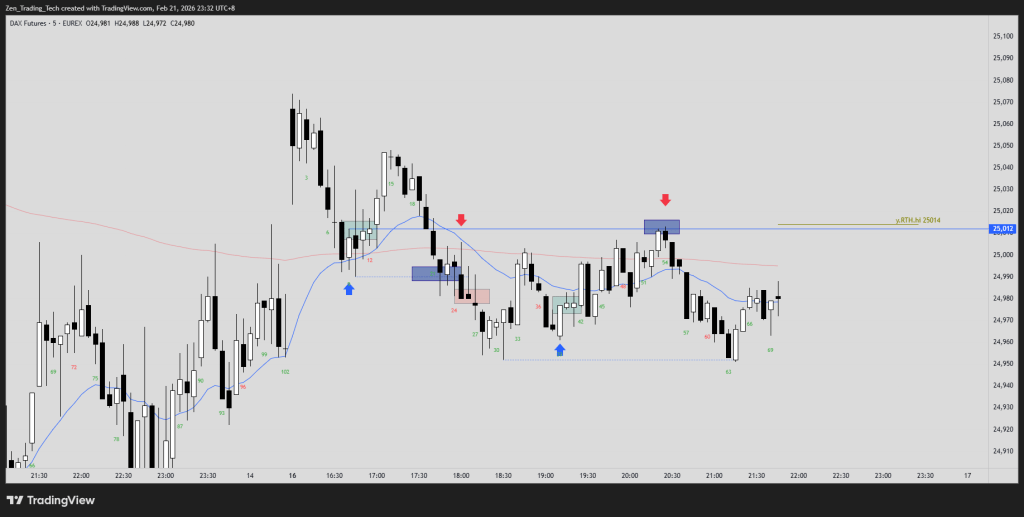
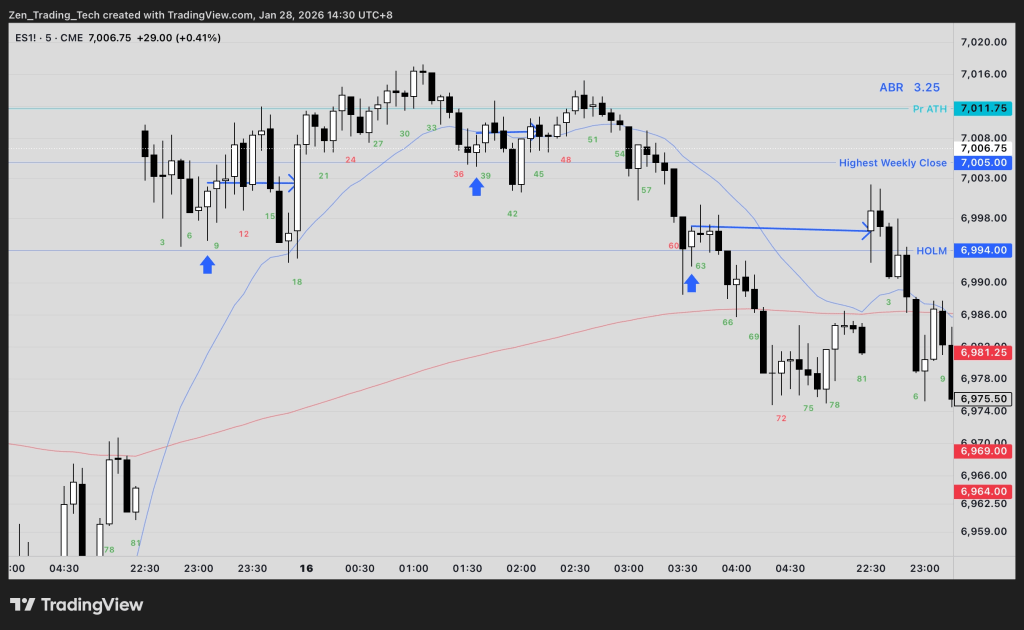
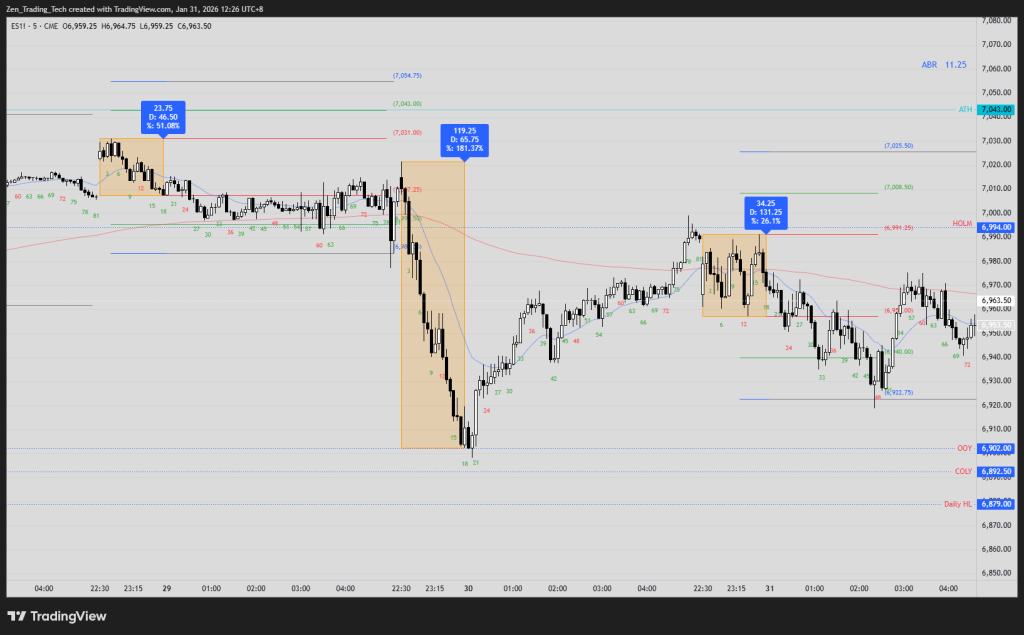
High Probability Trade Failed: 2nd Entry Long (H2) -> Test Target for later
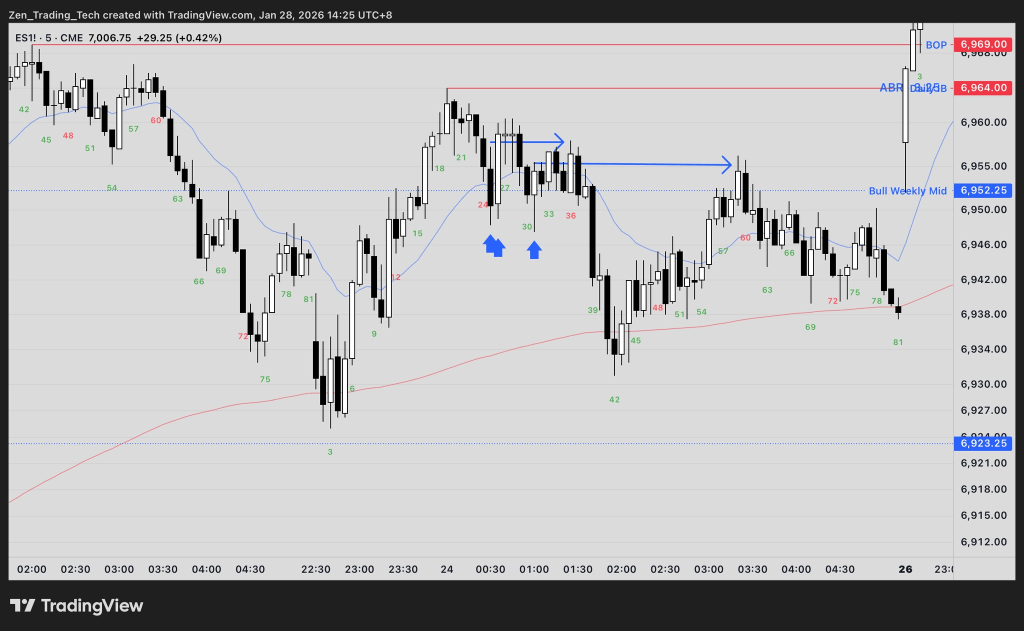
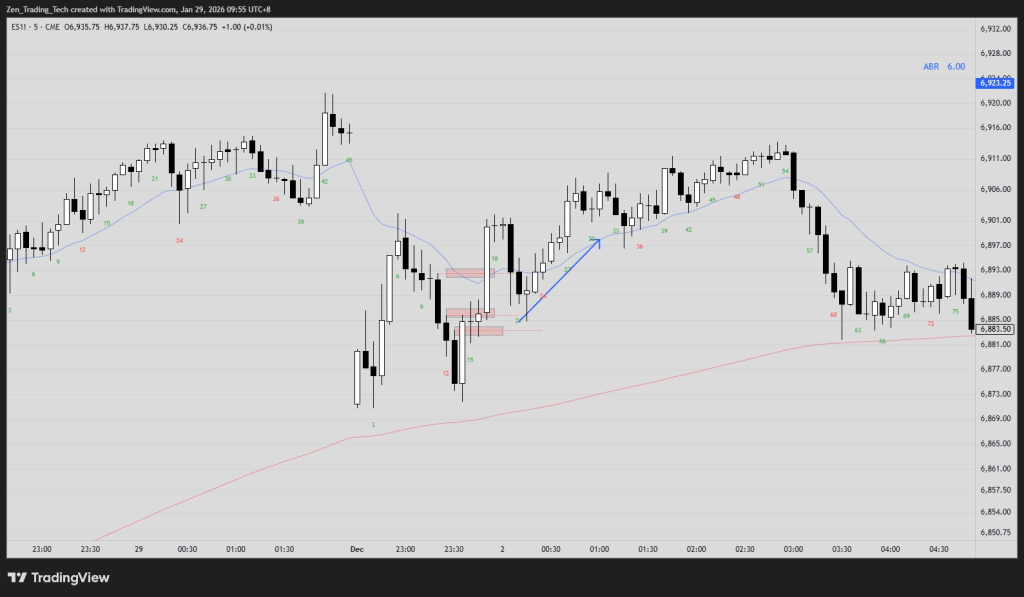
Here’s where it gets interesting. The H2 triggered, the bulls entered, and the market went against them. The second entry long — supposed to be the strong hand entry — failed.
Now think about what’s happening in the market. Two groups of buyers are trapped: those who bought the first pullback and those who bought the H2. Both groups are losing money. As the market drops further, they start exiting — and their exits (sells) add fuel to the move down.
But here’s the key insight: the level where those bulls entered doesn’t disappear from the market’s memory. That H2 entry price becomes a test target. The market has a high probability of returning to that level, because it represents a price where significant buying interest existed. When price comes back to test it, the trapped bulls who held on might exit at breakeven (creating resistance), or new buyers might step in seeing value at the same level.
Your loss on the H2 just told you where the market is going later.
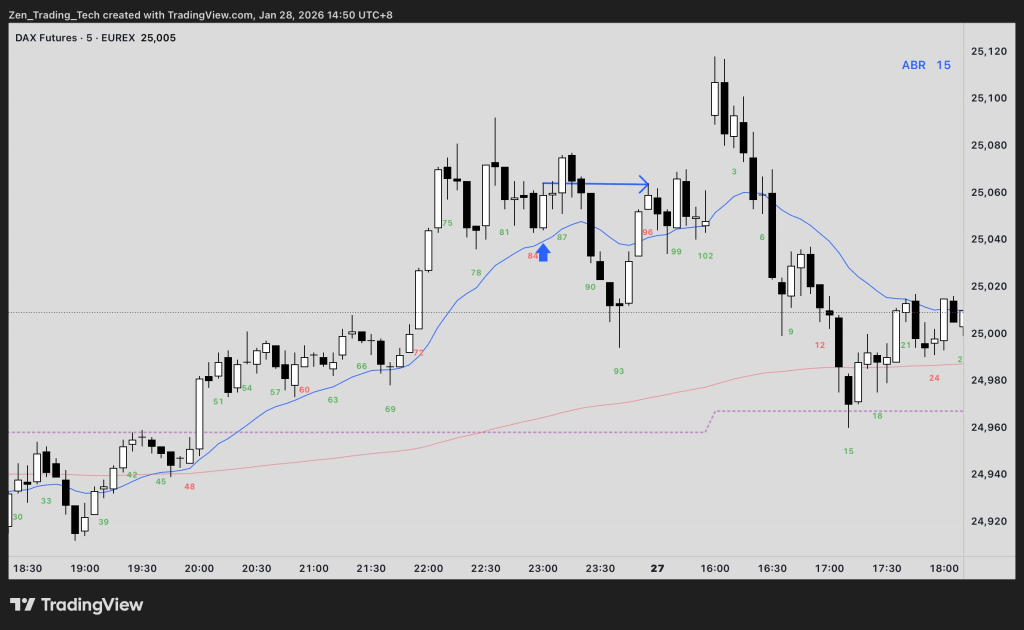
High Probability Trade Failed: Bear Microchannel Fade -> Test Target for later
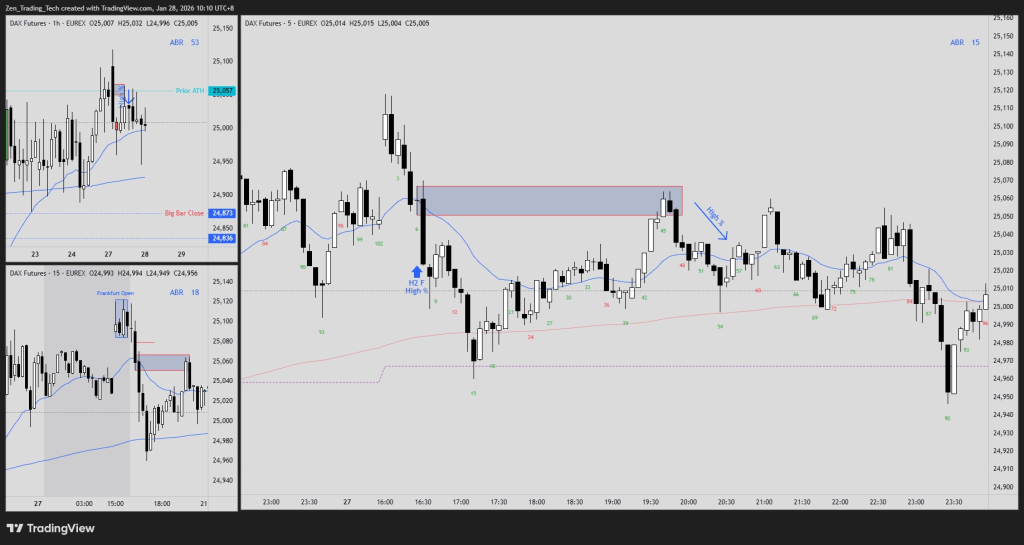
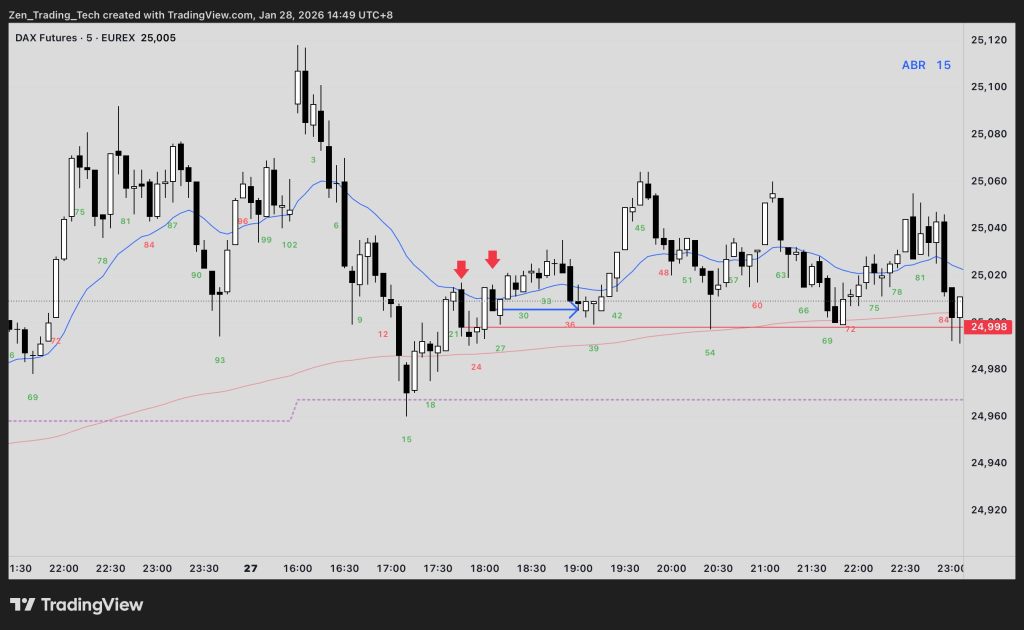
A bear microchannel is one of the most visually striking patterns on a chart — every bar’s high is at or below the prior bar’s high, creating a staircase of lower highs. It looks unstoppable.
The high probability trade is to fade it. When the first bar finally breaks above the prior bar’s high, it signals that the relentless selling pressure has paused. Buyers step in expecting at least a two-legged correction.
But when that fade fails — when the breakout above the prior high gets immediately sold and the microchannel resumes — the traders who bought the fade are now trapped. Same principle applies: their entry level becomes a test target. The market is likely to revisit that price, whether it takes 5 bars or 50.
This is a less commonly discussed pattern than the H2 or L2, but it follows exactly the same logic. High probability trade fails, trapped traders create a magnet, and the test becomes the next high probability setup.
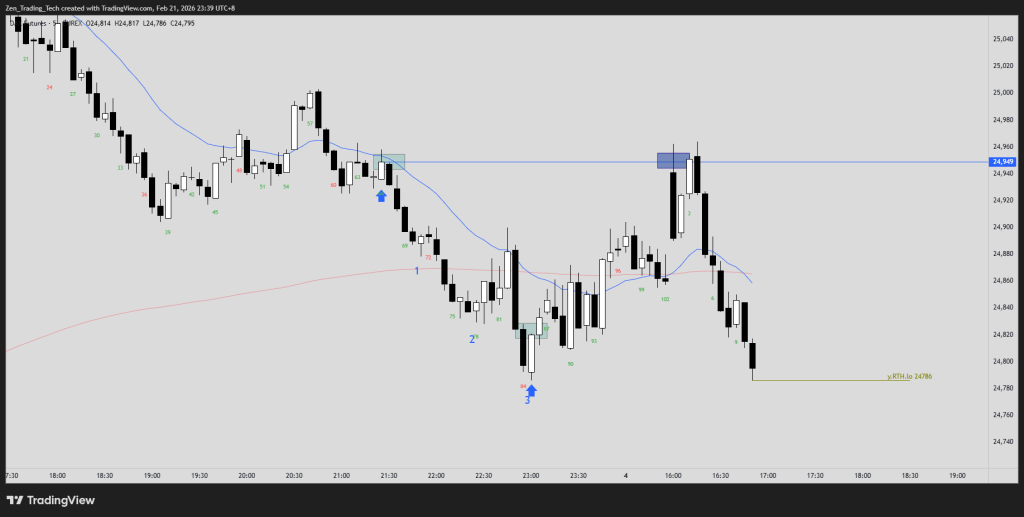
High Probability Trade Failed: 2nd Entry Short (L2) -> Test Target for later
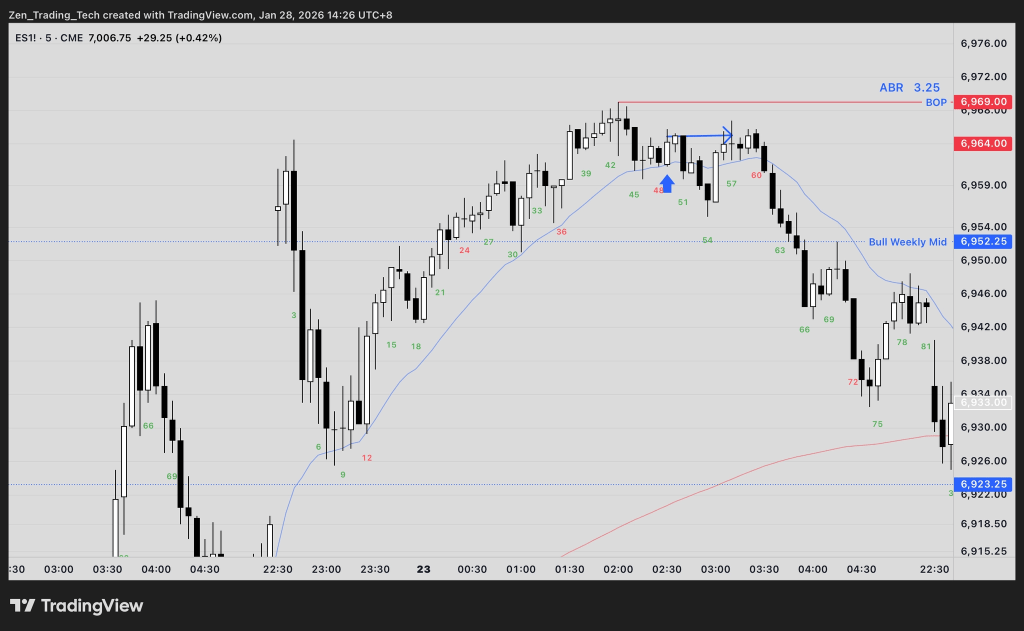
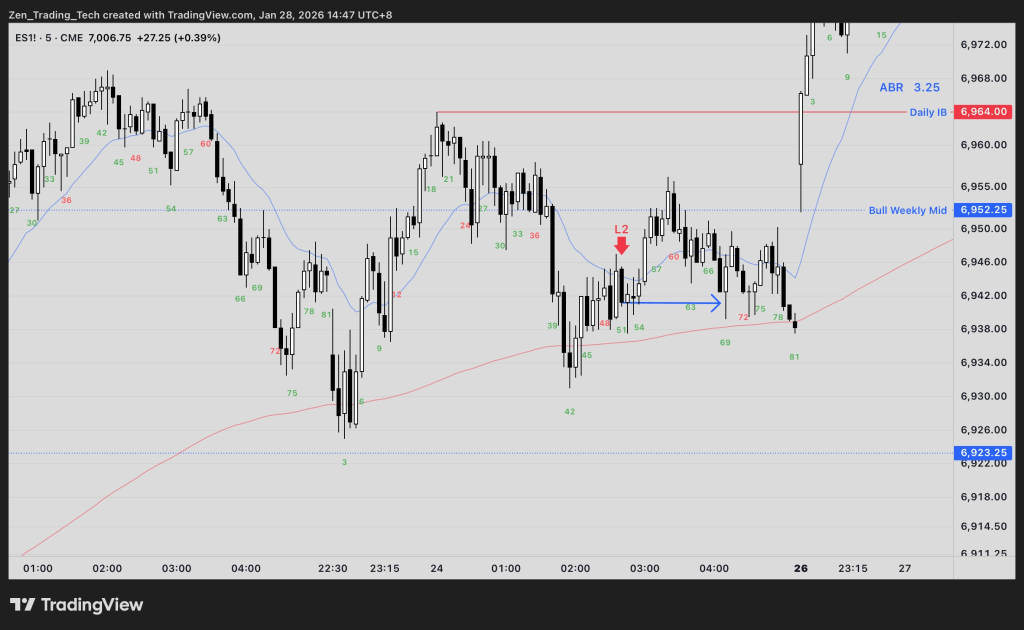
Now the same concept, mirrored on the short side. The L2 is the bear’s version of the H2 — a second entry short in a bear trend or during a rally to the moving average.
When an L2 fails, trapped bears who sold are now losing money as the market rallies against them. Their protective buy stops get hit, adding buying pressure. And just like with the failed H2, the level where those bears entered becomes a test target. The market has a high probability of pulling back to that L2 entry level.
Three different patterns, three failures, three test targets. And that’s the framework — every high probability failure leaves a footprint on the chart that you can use for your next trade.

To be continued…!
- That’s Part 1. We’ve looked at three high probability setups — the H2, the bear microchannel fade, and the L2 — and seen how each failure creates a test target for later.
- But the real question is: what happens when those tests fail too? When the market returns to the failed H2 level and doesn’t hold? That’s the failure of the failure — and it’s where Part 2 picks up. We’ll look at what to do when the test doesn’t work, when to scale in, and how to read whether the day is becoming a trading range where the rules change.
- Part 2 coming soon.


Leave a reply to generouspractically8612d94778 Cancel reply