I built a free, open-source risk/reward ruler for NinjaTrader 8 and I’m putting it on GitHub. No catch. It’s a single .cs file you drop into your indicators folder, compile, and use.
It does three things:
- measure R-multiples from the close (Buy/Sell the Close),
- measure R-multiples from a breakout entry beyond the bar’s High or Low (Buy Stop / Sell Stop),
- and project fixed tick distances for quick point move checks.
Direction is automatic — the indicator reads bar colour so you don’t have to think about it.
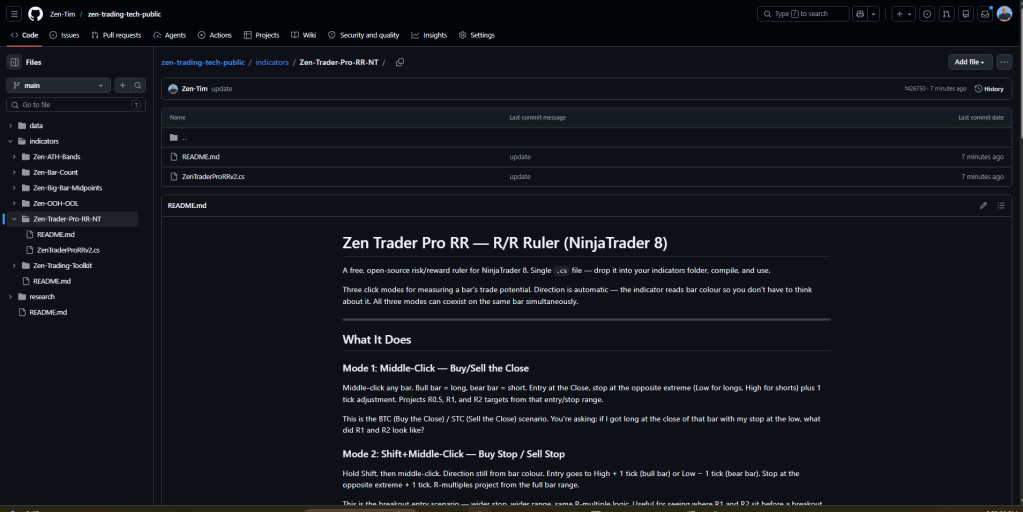
Download it here: https://github.com/Zen-Tim/zen-trading-tech-public/tree/main/indicators/Zen-Trader-Pro-RR-NT
What It Does
There are three click modes. Each one answers a specific question about a bar.
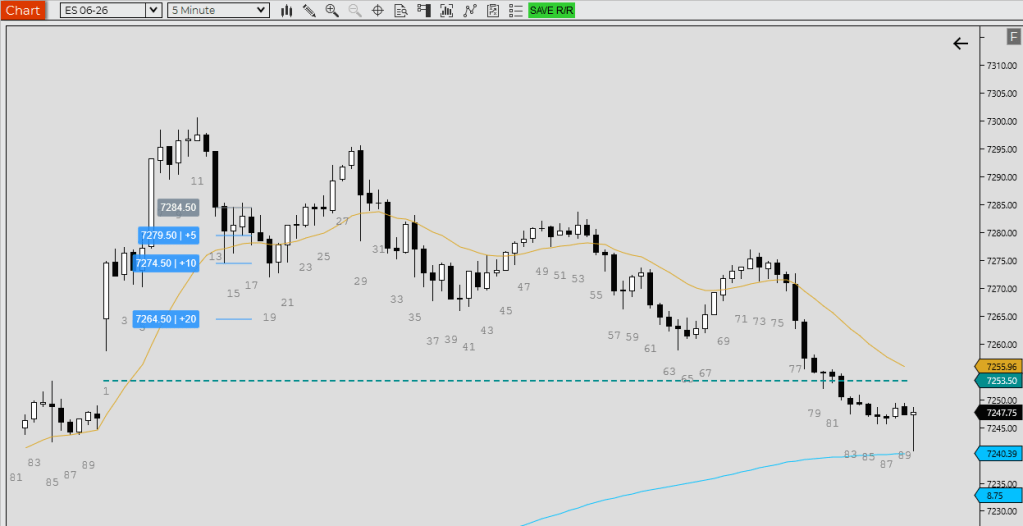
Mode 1: Middle-Click — Buy/Sell the Close
Question it answers: “What does the trade look like if I buy (or sell) the close of this bar?”
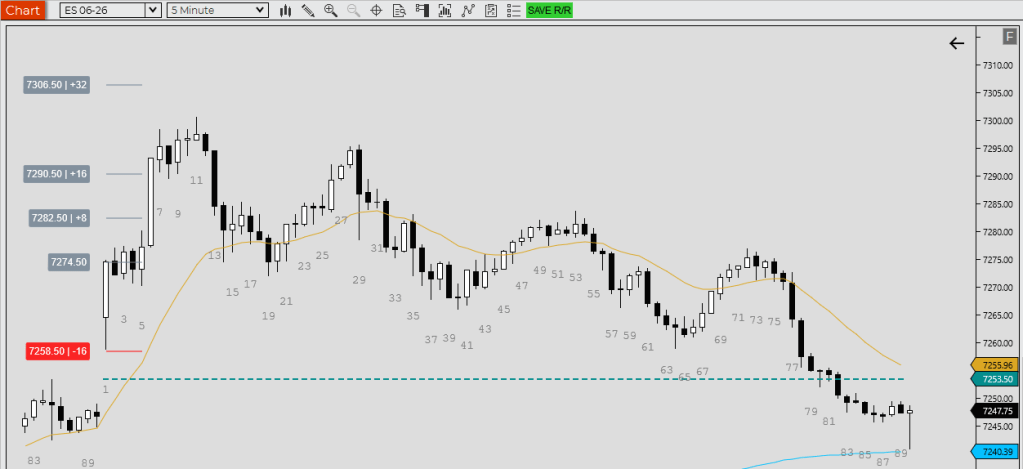
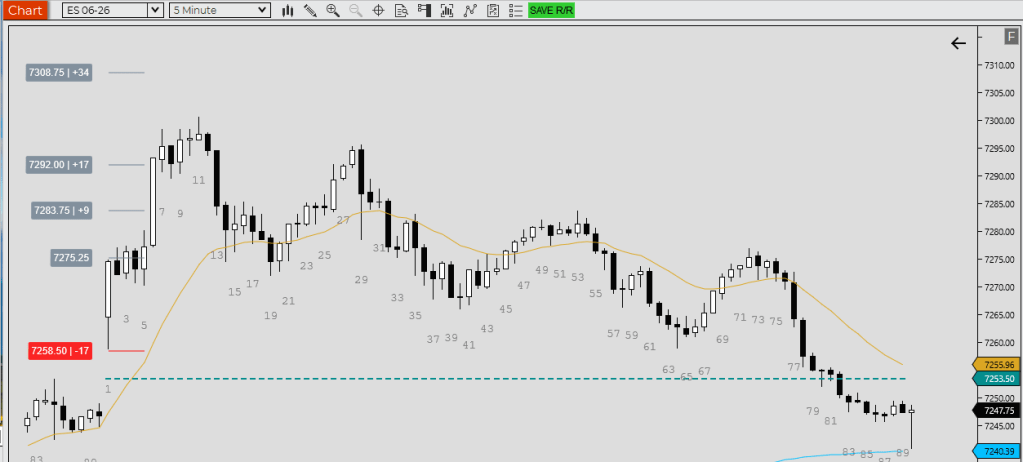
Middle-click any bar. The indicator reads bar colour — bull bar (close ≥ open) = long, bear bar = short. No guessing, no toggle. Entry goes to the Close. Stop goes to the opposite extreme (Low for longs, High for shorts) minus/plus 1 tick. Then it projects R0.5, R1, and R2 targets from that entry/stop range.
This is the BTC (Buy the Close) / STC (Sell the Close) scenario measurement. You’re asking: if I got long at the close of that bar, with my stop at the low, what did R1 and R2 look like?

Mode 2: Shift+Middle-Click — Buy Stop / Sell Stop
Question it answers: “What does the trade look like if I enter on a breakout of this bar’s extreme?”
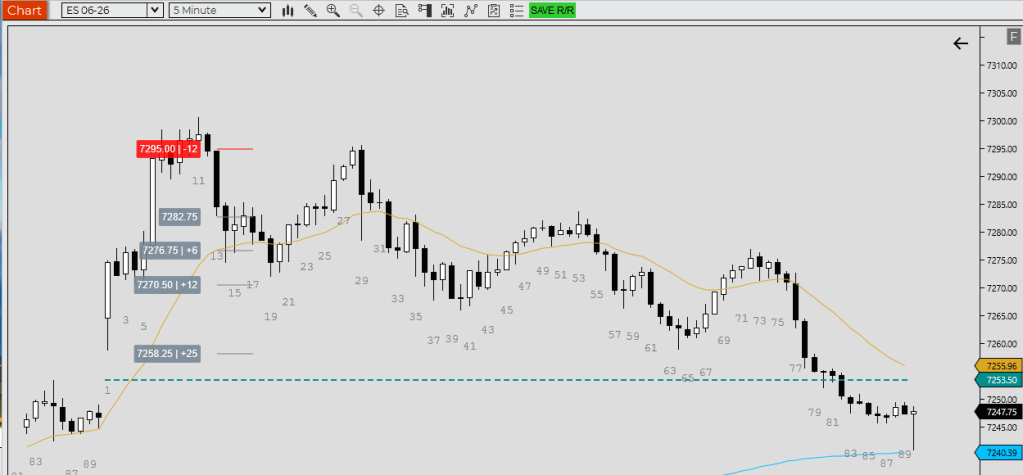
Hold Shift, then middle-click. Direction still comes from bar colour. But now entry goes to High + 1 tick (bull bar) or Low − 1 tick (bear bar). Stop goes to the opposite extreme + 1 tick. This is the full bar range plus a tick of buffer on both sides, and R-multiples project from there.
This is the breakout entry (BO) scenario. Wider stop, wider range, same R-multiple logic. Useful for setups where you’re expecting a BO and want to see where R1 and R2 sit before the move happens.
Mode 3: Ctrl+Middle-Click — Fixed Distance Targets
Question it answers: “Where does 20 ticks, 40 ticks, 80 ticks sit from the close of this bar?”
You cancustom set them.
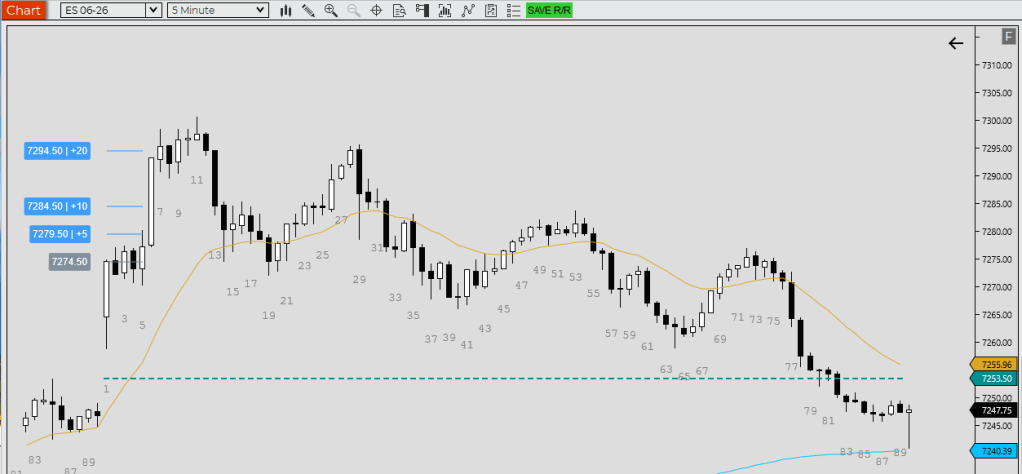
Hold Ctrl, then middle-click. No entry/stop logic. The indicator takes the Close and projects three fixed tick distances in the direction of bar colour. Defaults are 20, 40, and 80 ticks — all configurable. No R-multiple calculation involved.
This is the quick measured move (MM) check. Where does 1× range sit? Where does 2×? You set the distances once in the settings and then it’s a one-click answer on any bar.
Stacking and Removing Rulers
By default, Allow Multiple Rulers is OFF. Each new click replaces the previous ruler. That keeps the chart clean when you’re just scanning bars.
Turn it ON and rulers stack.
You can have all three modes on the same bar simultaneously — a close entry, a breakout entry, and a fixed distance check, all visible at once. To remove a specific ruler, click the same bar with the same mode and it toggles off.
Settings Worth Knowing
The defaults work for most instruments. A few settings are worth adjusting for your setup:
- Convert Ticks to Points — ON by default. For FDXS and most futures where 1 point = 1 tick, this shows clean point distances on the labels. Turn it OFF if your instrument has tick sizes that don’t map 1:1 to points (e.g. CL, ZB).
- R-multiple multipliers — R1=0.5, R2=1.0, R3=2.0 by default. You can set all four (R1–R4) independently, with per-line tick adjustments. R4 is off by default.
- Ruler Width #Bars — how far the lines extend to the right of the clicked bar. Default is 4 bars.
- Stop/Entry Adjust Ticks — adds a tick buffer to stop and entry placement. Stop default is 1 tick, entry default is 0.
- Label content — toggle Show Distance, Show Price, and Show Currency Value independently. Currency P&L uses the instrument’s point value and your contract count setting.
- Label style — background opacity, text opacity, line opacity, padding, corner radius, and offset from bar are all adjustable. The defaults give you a clean, readable look out of the box.
- Colours — every line type has its own colour: stop (red), entry (slate gray), R1–R4 (slate gray by default, easy to differentiate by changing), fixed distance lines (dodger blue).
- Fixed distance ticks — defaults are 20, 40, 80. Set these to whatever distances matter for your instrument and trading style.
How to Install on NinjaTrader 8
No import wizard, no licence file. It’s a plain NinjaScript indicator — copy the file, compile, done.
Step 1: Download the file
Go to https://github.com/Zen-Tim/zen-trading-tech-public/tree/main/indicators/Zen-Trader-Pro-RR-NT and download ZenTraderProRRv2.cs.
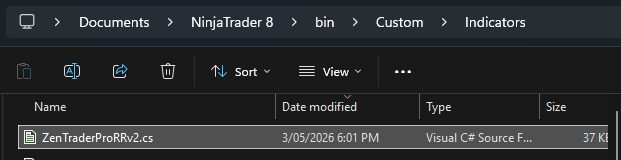
Step 2: Copy the file into your NinjaTrader indicators folder
Open Windows Explorer and navigate to:
...\Documents\NinjaTrader 8\bin\Custom\Indicators\
Copy ZenTraderProRRv2.cs into that folder.
Step 3: Open NinjaTrader 8
Launch NT8 if it isn’t already open.
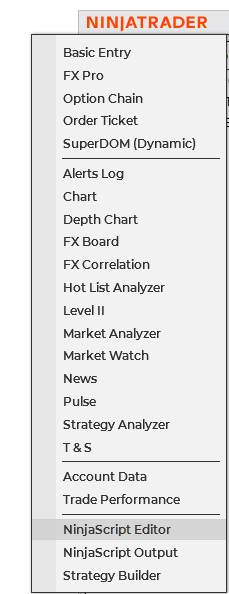
Step 4: Open the NinjaScript Editor
Go to Tools → Edit NinjaScript → Indicators (or press Ctrl+Shift+N).
Step 5: Find and open the file
In the NinjaScript Editor, find ZenTraderProRRv2 in the file list on the left. Double-click to open it.
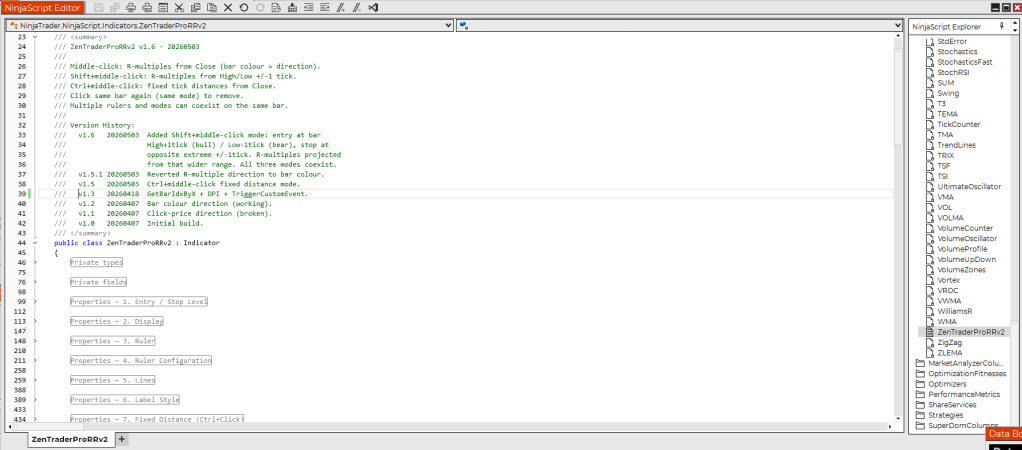
Step 6: Compile
Click the Compile button (the small building icon in the toolbar). You should see “Compiled successfully” in the output panel at the bottom. No errors means you’re good.

Step 7: Add it to your chart
Go to a chart. Right-click → Indicators. In the search box, type Zen. You’ll see ZenTraderProRRv2 in the list. Select it and click Add, then OK.
Step 8: Use it
Start with the defaults and adjust from there. Middle-click any bar to place a ruler. Shift+middle-click for the breakout mode. Ctrl+middle-click for fixed distances. Click the same bar with the same mode to remove it.
The code is on GitHub, it’s MIT licensed, do whatever you want with it. If you run into a bug or want to suggest something, open an issue on the repo or comment here!
Happy trading!
Tim
Zen Trading Tech


Leave a comment